The Scan to E-mail feature lets you scan a document to your default E-mail application so you can send the scanned document as an attachment.
| 1 | Select the SCAN tab. |
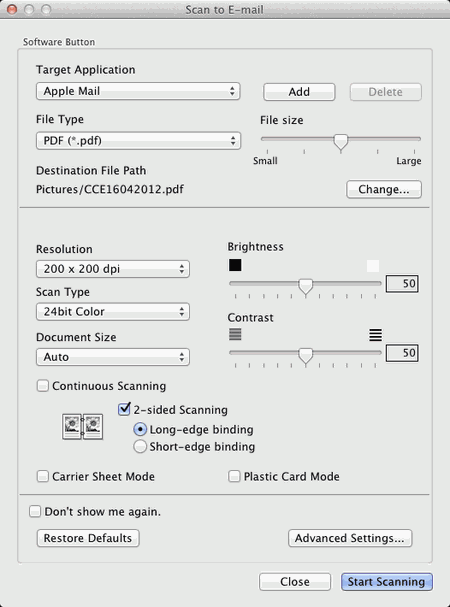
| 2 | Click  ( E-mail). The Scan to E-mail dialog box will appear. |
| 3 | You can configure the scan settings. | • | To scan a 2-sided document, check the 2-sided Scanning check box and choose Long-edge binding or Short-edge binding. | | • | To change the E-mail application that you want to use, choose the appropriate application from the Target Application pop-up menu. You can add an application to the list by clicking Add1. If you want to delete an application, click Delete. |
|
| 4 | Click Start Scanning. Your default E-mail application will start and the image will be attached to a new E-mail. |

Note
| | The Scan to E-mail feature does not support Webmail services. Use the Scan to Image or Scan to File feature to scan a document or picture, and then attach the file of the scanned data to an E-mail message. |