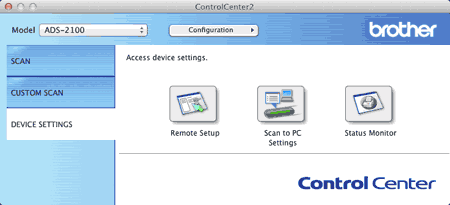
| 1 | Click the The ControlCenter2 window will appear. |
| 2 | Click the DEVICE SETTINGS tab.  |
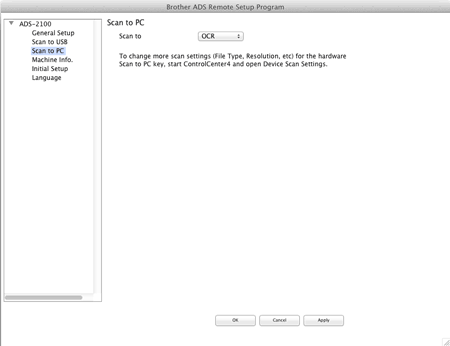
| 3 | Click the Scan to PC Settings button. The Remote Setup window will appear.  |
| 4 | Select OCR from the drop-down list. |
| 5 | Click the OK button to close the Remote Setup window. |
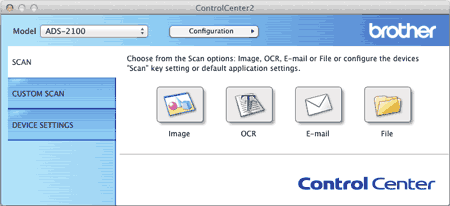
| 6 | Click the SCAN tab on the ControlCenter2 window.  |
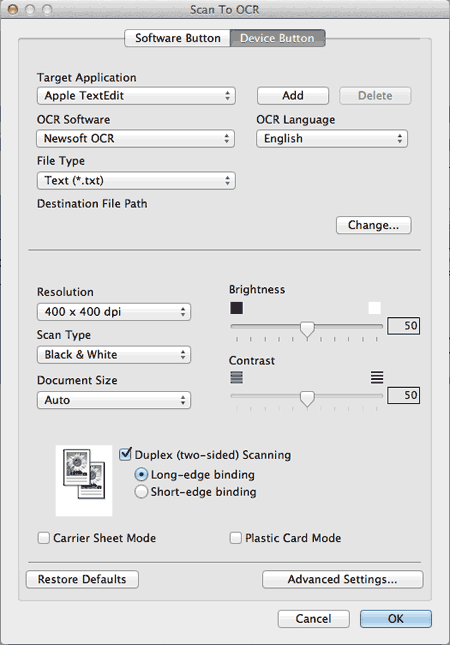
| 7 | Click the OCR button while holding down the Control key. The Scan To OCR dialog box will appear. |
| 8 | Click the Device Button tab.  |
| 9 | Change other settings if needed (see Change Scan Settings). |
| 10 | Load your document. |
| 11 | Press Scan to PC. The machine scans the document, converts it into editable text, then sends it to your default word processing application. |