Scan Both Sides of a Document Automatically

1
Load your document.
2
Click the Graphic (ControlCenter4) icon in the task tray and then select Open from the menu.
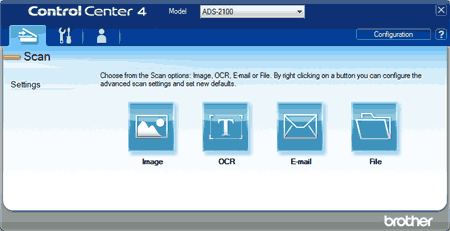
The ControlCenter4 window will appear.
Note Note
You can also start ControlCenter4 by doing one of the following:
(Windows® XP, Windows Vista®)
Double-click the Graphic (ControlCenter4) icon in the task tray.
Click ControlCenter4 located in Start/All Programs/Brother/ADS-XXXX (where XXXX is your model name).
3
Select the Scan tab.
Screen
4
Right-click the button you want to change (Graphic (Image), Graphic (OCR), Graphic (E-mail), or Graphic (File)).
5
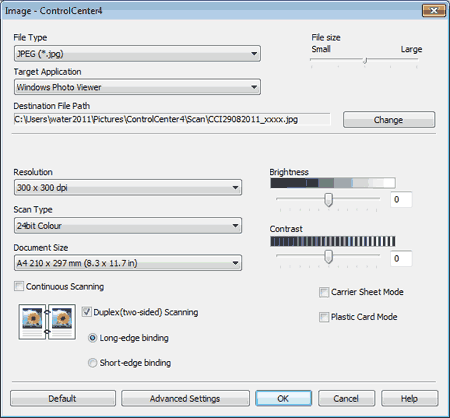
Select Button settings from the list. The setting dialog box will appear (the example below uses Image).
Screen
6
Check the Duplex(two-sided) Scanning check box.
Note Note
If you cannot check the Duplex(two-sided) Scanning check box, select a document size other than Long Paper from the Document Size drop-down list.
7
Select Long-edge binding or Short-edge binding depending on the document layout displayed in the following table.
2-sided (Duplex) Scan Setting
Original Layout
Scan Result
Long-edge binding
Graphic
Graphic
Short-edge binding
Graphic
Graphic
8
Change other settings if needed (see Change Scan Settings).
9
Click the OK button.
You have now changed the default settings for your chosen Scan-to action. These settings will be used every time a scan option (Graphic (Image), Graphic (OCR), Graphic (E-mail), or Graphic (File)) is clicked for the action next time.