| 1 | Load your document. | ||||
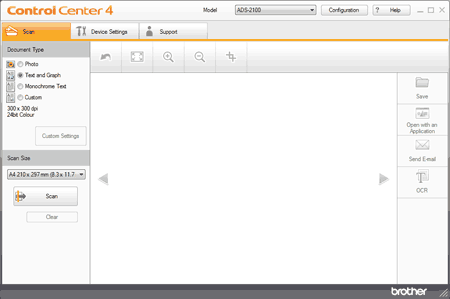
| 2 | Click the The ControlCenter4 window will appear. | ||||
| 3 | Select the Scan tab.  | ||||
| 4 | Do one of the following:
| ||||
| 5 | Change the scan size if needed (see Change the Scan Size). | ||||
| 6 | Click the The machine starts scanning, and then the Scanning Completed dialog box will appear and display the number of scanned pages. The scanned image appears in the image viewer. | ||||
| 7 | Click the left or right arrow buttons to preview each scanned document. | ||||
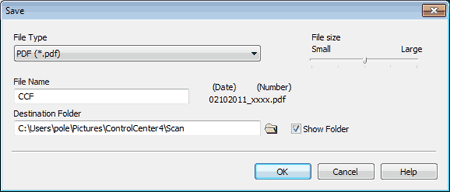
| 8 | Click the The Save dialog box will appear.  | ||||
| 9 | Select a file type from the File Type drop-down list. | ||||
| 10 | In the File Name field, enter a prefix for the file name if needed. | ||||
| 11 | In the Destination Folder field, click the folder icon and browse to the folder you would like to save your scanned document to. | ||||
| 12 | Click the OK button. The scanned document is saved in the destination folder. |