The (File) button lets you scan an image and save it to a folder on your hard disk in one of the file types shown in the file attachment list.
1
Load your document.
2
Click the (ControlCenter4) icon in the task tray and then select Open from the menu.
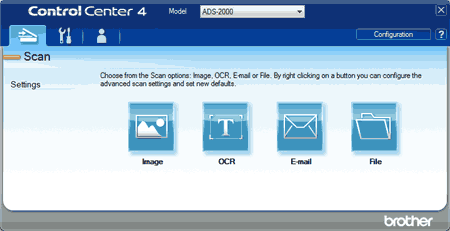
The ControlCenter4 window will appear.
Note
You can also start ControlCenter4 by doing one of the following:
•
(Windows® XP, Windows Vista®)
Double-click the (ControlCenter4) icon in the task tray.
•
Click ControlCenter4 located in Start/All Programs/Brother/ADS-XXXX (where XXXX is your model name).
3
Select the Scan tab.
4
Right-click the (File) button and select Button settings to change scan settings, such as file format, file name, destination folder, resolution or color if needed (see Change Scan Settings).
5
Click the (File) button.
The message dialog appears. Click the Start Scanning button.
The image will be saved in the folder you have chosen.
Note
Check the Don’t show me again. check box not to show the message dialog again.