Home > Transfer Templates to the Printer Using Your Computer (Windows) > Transfer a Template or Other Data from the Computer to the Printer (Windows)


Transfer a Template or Other Data from the Computer to the Printer (Windows)
- Connect the printer to the computer using a USB cable, and then turn the printer on.
- Start P-touch Editor
 .
. Click , or double-click the P-touch Editor icon on the desktop.
*Depending on your computer's operating system, the Brother P-touch folder may or may not be created.
- Make sure your model's name is selected on the Home screen.
- Open the template you want or create a new layout.
- Click .The Transfer window appears. The template is listed in the window.
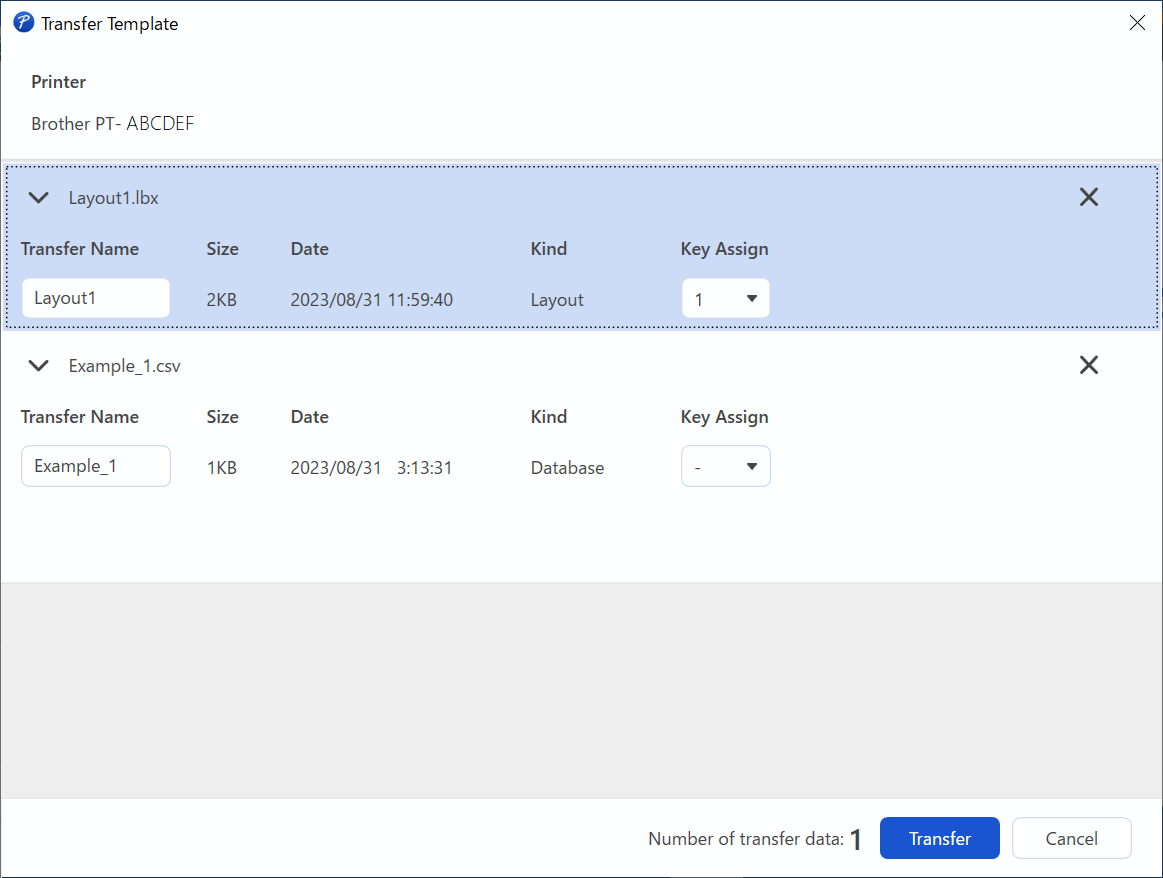
- To change the Key Assign number (memory location in the printer) assigned to an item, click the item you want, and then select the number.
- NOTE
-
- The database is not assigned a Key Assign number.
- The printer will overwrite any previously saved template that has the same key number as a new template being transferred to it.
- To change the transfer name of the template or other data, click the item you want, and then type the new name.The number of characters differs depending on the printer model.
- Make sure the template or other data you want to transfer is selected in the file list, and then click Transfer.
- Click OK.The selected items are transferred to the printer.

You can transfer multiple templates or other data at the same time. For more information, see Related Information.
Did you find the information you needed?