Home > Create and Print Labels Using Your Computer > Create Labels Using P-touch Editor (Windows)


Create Labels Using P-touch Editor (Windows)
The transfer function can only be used with P-touch Editor 5.4.
To use your Label Maker with your Windows computer, install P-touch Editor and the printer driver on your computer.
For the latest drivers and software, go to your model's Downloads page on the Brother support website at support.brother.com.
- Start P-touch Editor
 .
. Windows 11:
Click , or double-click the P-touch Editor icon on the desktop.
*Depending on your computer's operating system, the Brother P-touch folder may or may not be created.
Windows 10:
Click , or double-click the P-touch Editor icon on the desktop.
Windows 8.1:
Click the P-touch Editor icon on the Apps screen, or double-click the P-touch Editor icon on the desktop.
- Do one of the following:
- P-touch Editor 5.4
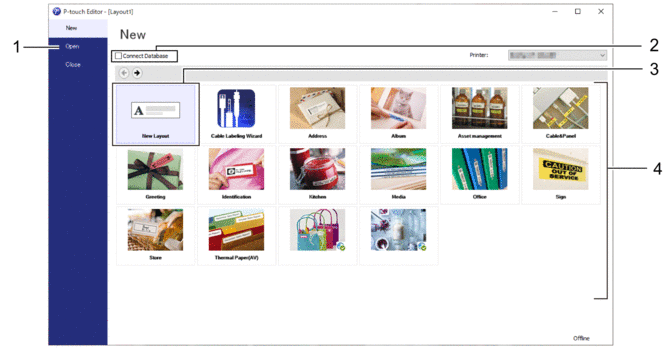
- To open an existing layout, click Open (1).
- To connect a preset layout to a database, select the checkbox next to Connect Database (2).
- To create a new layout, double-click the New Layout pane (3), or click the New Layout pane (3) and then click →.
- To create a new layout using a preset layout, double-click a category button (4), or select a category button (4), and then click →.
- P-touch Editor 6.0
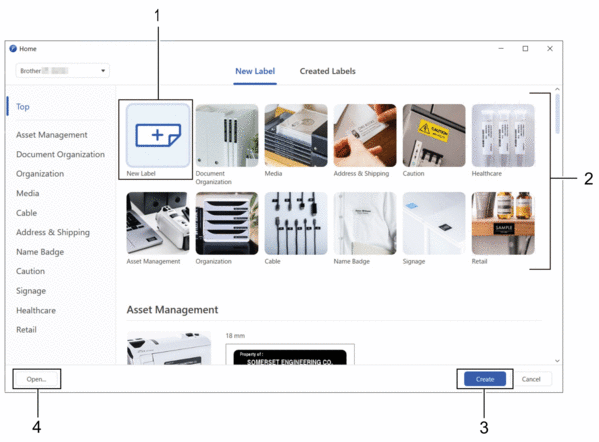
- To open an existing layout, click Open (4).
- To create a new layout, click the New Label tab and the New Label button (1).
- To create a new layout using a preset layout, click the New Label tab and click a category button (2), select a template, and then click Create (3).