Home > Create Labels and Print Using Computer > Create Labels Using P-touch Editor (Windows)


Create Labels Using P-touch Editor (Windows)
To use your printer with your computer, install P-touch Editor and the printer driver.
For the latest drivers and software, go to your model's Downloads page on the Brother support website at support.brother.com.
- Start the P-touch Editor
 .
. Windows 10/Windows Server 2016:
Click , or double-click the P-touch Editor 5.2 icon on the desktop.
Windows 8/Windows 8.1/Windows Server 2012/Windows Server 2012 R2:
Click the P-touch Editor 5.2 icon on the Apps screen, or double-click the P-touch Editor 5.2 icon on the desktop.
Windows 7/Windows Server 2008/Windows Server 2008 R2:
Click , or double-click the P-touch Editor 5.2 icon on the desktop.
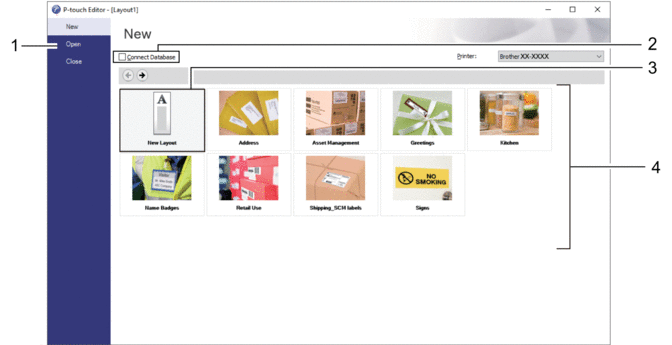
P-touch Editor starts. - Do one of the following:
- To open an existing layout, click Open (1).
- To connect a preset layout to a database, select the check box next to Connect Database (2).
- To create a new layout, double-click the New Layout pane (3), or click the New Layout pane (3) and then click →.
- To create a new layout using a preset layout, double-click a category button (4), or select a category button (4) and then click →.
 To change how P-touch Editor starts, click in the P-touch Editor menu bar to display the Options dialog box. On the left side, select the General heading, and then the setting you want in the Operations list box under Startup Settings.
Did you find the information you needed?