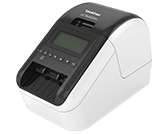
QL-820NWB
FAQs & Troubleshooting |

QL-820NWB
Date: 12/11/2019 ID: faqp00000397_005
How do I install/change the label roll?
To install a new label roll:
-
Make sure that the printer is turned Off.
Hold the printer by the front, and firmly lift the DK Roll Compartment Cover to open it.

-
Place the DK Roll into the Roll Spool Guide.
- Make sure that the Roll Spool Arm (1) is inserted firmly in the Roll Spool Guide (2).
-
Make sure that the Stabilizer (3) slides into the notch of the printer.

-
Thread the DK Roll through the printer.
- Align the edge of the DK Roll with the upright edge of the Label Output Slot.
- Insert the first label into the slot inside the compartment.
-
Push the label through the Label Output Slot until the end reaches the mark, as shown.

-
Close the DK Roll Compartment Cover.
When you press the Power ( ) Button to turn the printer On, the end of the DK Roll aligns automatically.

Do not leave any printed labels in the printer. Doing so will cause the labels to jam.
To remove a label roll:
-
Make sure that the printer is turned Off.
Hold the printer by the front, and firmly lift the DK Roll Compartment Cover to open it.
-
Hold the label roll by the spool arms and pull the inserted DK Roll up.
- Close the DK Roll compartment cover.
QL-800, QL-810W, QL-820NWB
If you need further assistance, please contact Brother customer service:
Content Feedback
To help us improve our support, please provide your feedback below.
Step 1: How does the information on this page help you?
Step 2: Are there any comments you would like to add?
Please note this form is used for feedback only.