1634D
FAQs & Troubleshooting |
1634D
Date: 08/09/2017 ID: faqh00000491_000
Adjusting the thread tension dials
Thread tension dial
|
|
|
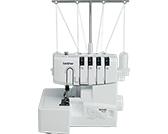
From the left to right: (1) Yellow marked tension disc is for left needle. (2) Pink marked tension disc is for right needle. (3) Green marked tension disc is for upperlooper. (4) Blue marked tension disc is for lowerlooper. |
(5) Tension selection mark. (6) Dial up to decrease tension. (7) Dial down to increase tension. |


Make sure that the thread is properly seated in the tension discs by holding the tension release button to the right while passing the thread through the tension discs.
Tension control
Sewing is possible at position “4” for most circumstances.
If improper stitching occurs, adjust the tension according to the drawing below.
(Standard: SPAN 60/3Z)
|
|
(A) for heavy tension (set from 4 to 7)
(B) for light tension (set from 4 to 2)
(C) for medium tension (set from 5 to 3) |

There is a thread tension adjustment dial for each needle thread, the lowerlooper thread and the upperlooper thread. The correct thread tension may vary according to the type and thickness of the fabric and the type of thread used. Thread tension adjustments may be necessary for any change in sewing materials. If the stitch quality is insufficient, select a different tension setting.
Adjusting the thread tension
(1) To select the correct tension, refer to the illustration of the thread tension dial above.
(2) If you cannot find the correct tension, refer to the chart of thread tension adjustment on the operation manual.
1034D, 1134DW/ 1134D, 1634D, DZ1234, DZ1234
If you need further assistance, please contact Brother customer service:
Content Feedback
Please note this form is used for feedback only.