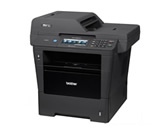
MFC-8950DW
FAQs & Troubleshooting |

MFC-8950DW
Date: 14/05/2012 ID: faq00002757_008
Change or delete an existing One Touch or Speed Dial number.
You can change or delete a One Touch or Speed Dial number that has already been stored. If the stored number has a scheduled job, such as a delayed fax or a fax forwarding number, it will be dimmed on the LCD. You cannot select the number to make changes or to delete it unless you first cancel the scheduled job. Click here to see how to check and cancel waiting jobs.
- Press
 (Address Book).
- Press Edit.
- Do one of the following:
- Press Change to edit the name, number or e-mail address and go to STEP 4.
- Press Delete to delete all information in a Speed Dial or One Touch number.
Choose the number you want to delete by pressing it to display a red check mark. Press OK.
When Erase This Data? appears, press Yes to accept it. Go to STEP 8.
- Press Change to edit the name, number or e-mail address and go to STEP 4.
- Press the Up or Down arrow key to display the number you want to change. Press the number you want to change.
One Touch Dial numbers begin with *. Speed Dial numbers begin with #.
- Press Name:, Number/Address:, Resolution: or PDF Type:.
- Do one of the following:
- If you chose Name:, enter the name (up to 15 characters) by pressing the buttons on the touchscreen. Press OK.
- If you chose Number/Address:, enter the new number (up to 20 digits) or e-mail address (up to 60 digits) by pressing the buttons on the touchscreen. Press OK.
- If you chose Resolution:, press one of the available resolution options displayed on the touchscreen.
- If you chose PDF Type:, press one of the available file type options displayed on the touchscreen.
The LCD will display your new setting.How to change the stored name or number:
If you want to change a character, press the Left or Right arrow key to position the cursor under the character you want to change, and then press . Re-enter the character.
- If you chose Name:, enter the name (up to 15 characters) by pressing the buttons on the touchscreen. Press OK.
- Do one of the following:
- When you are finished making changes, press OK.
- To change more details, go to STEP 6.
- When you are finished making changes, press OK.
- Press Stop/Exit.
MFC-8950DW
If you need further assistance, please contact Brother customer service:
Content Feedback
To help us improve our support, please provide your feedback below.
Step 1: How does the information on this page help you?
Step 2: Are there any comments you would like to add?
Please note this form is used for feedback only.