HL-6050DN
FAQs & Troubleshooting |
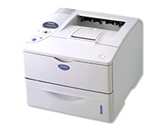
HL-6050DN
Date: 11/04/2019 ID: faq00000154_000
Replace the drum unit.
The Brother machine has separate consumables - the toner cartridge and the drum unit. Verify you replace only the drum unit and not the toner cartridge. If you want to know their difference, refer to "What is the difference between the toner cartridge and the drum unit?"
Follow the procedure below to replace drum unit.
Do NOT use flammable substances or any type of spray to clean the inside or outside of the machine. Doing this may cause a fire or electrical shock.

For the order number (Order No.) of the drum unit, please refer to the user's guide provided with your Brother printer or the Consumables & Options page of your model on Brother Solutions Center. To visit Consumables & Options page, click your model name link (e.g. HL-XXXX * ) on the top section and then click "Consumables & Options" link on the opened page. * XXXX stands for your model name.
-
Press the cover release button and then open the front cover of the printer.

-
Take out the drum unit assembly (drum unit with the toner cartridge).

- We recommend that you place the drum unit assembly on a piece of disposable paper or cloth in case you accidentally spill or scatter toner.
- To prevent damage to the printer from static electricity, do not touch the electrodes shown below.

-
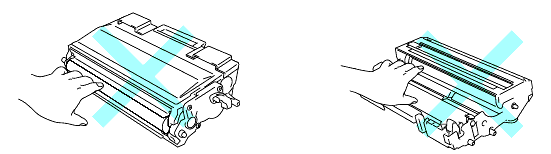
Push down the blue lock lever and take the toner cartridge out of the drum unit assembly.

- Handle the toner cartridge carefully. If toner scatters on your hands or clothes, immediately wipe or wash it off with cold water.
- Do not touch the shaded parts shown below to prevent any degradation to the print quality.
-
Unpack the new drum unit.
Wait to unpack a drum unit until immediately before you put it in the printer. Exposure to direct sunlight or room light may damage the drum unit.
-
Put the toner cartridge firmly into the new drum unit until you hear it lock into place. If you put the cartridge in properly, the blue lock lever will lift automatically.
Make sure you insert the toner cartridge properly, or it may separate from the drum unit when you pick up the drum unit assembly.

-
Gently wipe the scanner window with a dry, soft cloth.

-
Put the drum unit assembly in the printer. Make sure that the printer is turned on and the front cover is open.

-
Reset the drum counter. Press and hold down the Go button until ">>>>DRUM CLEAR" is displayed, and then release the Go button.
Do not reset the drum counter when you replace only the toner cartridge.

- Close the front cover of the printer.
Content Feedback
Please note this form is used for feedback only.