HL-5250DN
FAQs & Troubleshooting |

HL-5250DN
Date: 09/05/2013 ID: faq00000026_007
How do I clear paper jams?
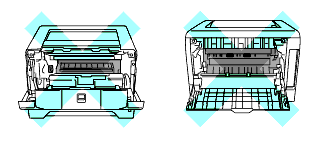
After you have just used the printer, some internal parts of the printer will be extremely hot. When you open the front cover or back cover of the printer, DO NOT touch the shaded parts shown in the illustrations.
Clear the jammed paper as follows.
If the jammed paper is removed completely by following the steps below, you can install the paper tray first, and then close the front cover. The printer will resume printing automatically.
If the printer does not start printing automatically, press Go. If the printer still does not start printing, check that all the remaining jammed paper has been removed from the printer. Then try printing again.
Always remove all paper from the paper tray and straighten the stack when you add new paper. This helps prevent multiple sheets of paper from feeding through the printer at one time and prevents paper jams.
-
Press the cover release button and then open the front cover.

-
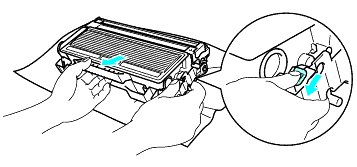
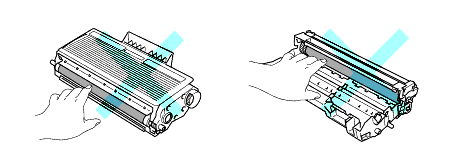
Slowly take out the drum unit and toner cartridge assembly. The jammed paper will be pulled out with the drum unit and toner cartridge assembly.

To prevent damage to the printer caused by static electricity, DO NOT touch the electrodes shown in the illustration.

-
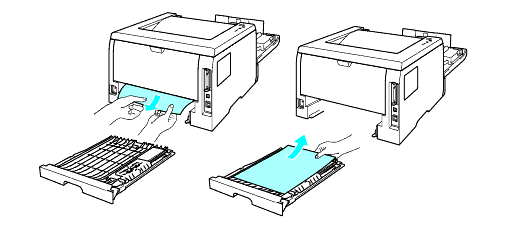
Pull the paper tray completely out of the printer.

- Close the front cover.
-
Pull the jammed paper up and out of the printer.

- Open the front cover again.

-
Open the back cover.

- Pull the tabs at the left and right hand sides (see Fig. A) toward you to open the fuser cover (1).

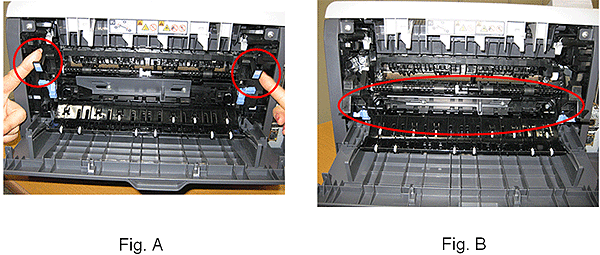
Fig. B shows both of the back cover and the fuser cover are open.There are 2 kinds of covers at the rear of the printer. Please make sure to open both the back cover (step 7) and the fuser cover (step8).
- Using both hands, gently pull the jammed paper out of the fuser unit.

After you have just used the printer, some internal parts of the printer will be extremely hot. Wait for the printer to cool down before you touch the internal parts of the printer.

-
Close the back cover.
-
Pull the duplex tray completely out of the printer.

- Pull the the jammed paper out of the printer or the duplex tray. Put the duplex tray back in the printer.
-
Push down the blue lock lever and take the toner cartridge out of the drum unit. Clear the jammed paper if there is any inside the drum unit.
- Handle the toner cartridge carefully. If toner scatters on your hands or clothes, wipe or wash it off with cold water at once.
- To avoid print quality problems, DO NOT touch the shaded parts shown in the illustrations.
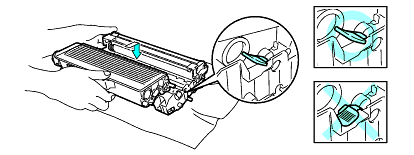
- Put the toner cartridge back into the drum unit until you hear it lock into place. If you put the cartridge in properly, the blue lock lever will lift automatically.
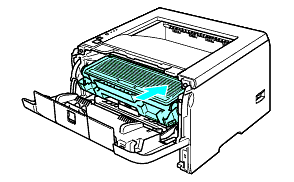
- Put the drum unit and toner cartridge assembly back in the printer.
- Put the paper tray firmly back in the printer.
- Close the front cover.
- Make sure that the Paper LED is now off and the printer is ready.
Related FAQs
HL-5240, HL-5240L, HL-5250DN
If you need further assistance, please contact Brother customer service:
Content Feedback
Please note this form is used for feedback only.