SL170
FAQs & Troubleshooting |
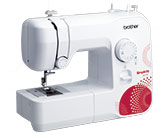
SL170
Date: 17/11/2015 ID: faqh00000580_003
How do I install the bobbin wound with thread?
Make sure you turn off the machine while threading. If you accidentally step on the foot controller and the machine starts to sew, you could be injured.
-
Prepare the bobbin wound properly before threading the lower thread.
Not winding the bobbin properly may cause the thread tension to loosen, and may break the needle.
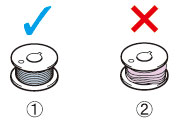
(1) Wound evenly
(2) Wound poorly -
Turn off the machine.

-
Raise the presser foot lever.
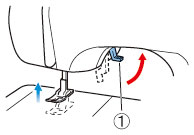
(1) Presser foot lever
-
Raise the needle by turning the handwheel toward you (counterclockwise).
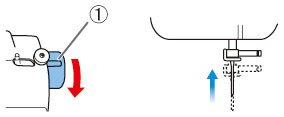
(1) Mark on the handwheel
-
Remove the bobbin cover by sliding it and lift toward you.
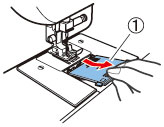
(1) Bobbin cover
-
Put the bobbin in so the thread comes out in the direction shown by the arrow.
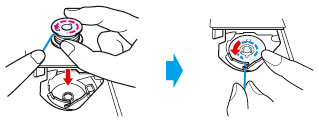
Make sure you set the bobbin so the thread unrolls in the right direction. If the thread unrolls in the wrong direction, it may cause the thread tension to be incorrect or break the needle.
-
Hold the end of the thread, push the bobbin down with your finger, and then pass the thread through the slit, as shown.
If the thread is not correctly inserted through the tension-adjusting spring of the bobbin case, it may cause incorrect thread tension.
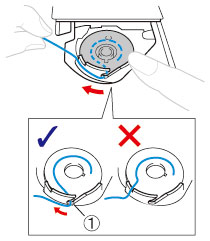
(1) Tension-adjusting spring
-
Replace the bobbin cover. Put the projection into the race retainer groove and push closed.
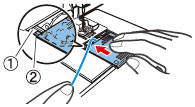
(1) Groove
(2) Projection
- Make sure that the end of the thread comes out from the cover toward the rear of the machine (as shown in the illustration).
- Draw up the lower thread before starting sewing. Refer to the description about “How do I draw up the lower thread?” and “How do I thread my machine?” after threading the upper thread.
Related FAQs
J17s, JA1400, JS1400, JS1410, JS1420, JS1700, JV1400, SL100, SL170
If you need further assistance, please contact Brother customer service:
Content Feedback
Please note this form is used for feedback only.