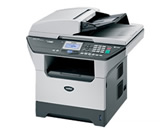
DCP-8065DN
FAQs & Troubleshooting |

DCP-8065DN
Date: 15/12/2008 ID: faq00002481_007
How do I clear the message "Check Paper Size" from the display?
The message "Check Paper Size" will appear on the display if the paper tray is not loaded properly with the correct size paper.
You can use nine sizes of paper for printing copies: A4, Letter, Legal, Executive, A5, A6, B5, B6 and Folio. For MFC users, you can also use four sizes to print faxes: A4, Letter, Legal, Folio. Tray #2 does not use the A6 paper size.
When you change the size of paper in the tray, you will also need to change the setting for paper size at the same time so your machine can fit on the page.
- Verify the paper is loaded correctly in the paper tray by following the steps listed below:
- Pull the paper tray completely out of the machine.
- Fan the stack of paper well to avoid paper jams or misfeeds.
- While pressing the blue paper-guide release lever, located on the right side of the machine, slide the paper guides to fit the paper size. Make sure that the guides are firmly in the slots.
For legal size paper, press the blue lever located at the back of the tray and pull out the back of the paper tray. If the back of the paper tray doesn't move, the tray lock button may be in the lock position; slide the lock button to the unlock position and pull out the back of the paper tray again. Load the legal size paper and move the guides and the back of the paper tray against the paper. Move the tray lock button to the lock position (slide the button towards the paper).
- Reload the paper in the paper tray. The tray can hold up to 250 sheets of 20lb paper. Do not over fill the tray. There is a maximum paper mark located on the top of the right and left paper guide. It looks like a "V" cut out in the plastic.
If you are using special paper and the machine has problems feeding it from the paper tray, try the paper again using the MP (Multi-purpose) tray.
- Put the paper tray firmly back into the machine and unfold the output paper tray support flap before using the machine.
- Follow the steps below to program the paper size:
- Press Menu.
- Press the up or down arrow key to select General Setup, and then press OK.
- Press the up or down arrow key to select Paper Size, and then press OK.
- Press the up or down arrow key to select the paper tray you want to use, and then press OK.
You can select MP tray, Tray#1 or Tray#2(if you installed the optional tray). - Press the up or down arrow keys to select the paper size you loaded into the paper tray.
- Press OK.
- Press Stop/Exit.
- To test, print the User Settings List by following the steps listed below:
- Press Menu.
- For MFC users :
Press the up or down arrow key to select Print Report, and then press OK.For DCP users :
Press the up or down arrow key to select General Setup, and then press OK. - Press the up or down arrow key to select User Settings, and then press OK.
- Press Start.
If the problem continues, please contact "Brother Customer Service".
DCP-8060, DCP-8065DN, MFC-8460N, MFC-8860DN
If you need further assistance, please contact Brother customer service:
Content Feedback
Please note this form is used for feedback only.