Innov-is XP1
FAQs & Troubleshooting |
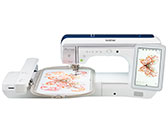
Innov-is XP1
Date: 24/09/2019 ID: faqh00000639_004
How do I attach or remove the embroidery frame ?
Wind and insert the bobbin before attaching the embroidery frame.
Attaching the Embroidery Frame
-
Press the Presser Foot Lifter button to raise the presser foot.

-
Align the embroidery frame guide with the right edge of the embroidery frame holder.

(1) Embroidery frame holder
(2) Embroidery frame guide
-
Slide the embroidery frame into the holder,
making sure to align the embroidery frame’s with the holder’s
  .
.

(1) Arrow mark
-
Lower the frame-securing lever to be level with the frame to secure the embroidery frame in the embroidery frame holder.

(1) Frame-securing lever If the frame-securing lever is not lowered, the message Make sure embroidery frame is moved as far back as possible. LOCK DOWN THE FRAME-SECURING LEVER. appears. You cannot start embroidering until you lower the framesecuring lever.

Removing the Embroidery Frame
-
Press the Presser Foot Lifter button to raise the presser foot.
-
Raise the frame-securing lever.

-
Pull the embroidery frame toward you.

Innov-is XP1
If you need further assistance, please contact Brother customer service:
Content Feedback
To help us improve our support, please provide your feedback below.
Step 1: How does the information on this page help you?
Step 2: Are there any comments you would like to add?
Please note this form is used for feedback only.