JA20
FAQs & Troubleshooting |
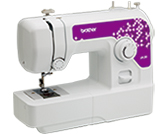
JA20
Date: 21/01/2016 ID: faqh00100121_002
How do I sew with the twin needle?
We have designed your machine so you can sew with this needle and two top threads. You can use the same color or two different colors of thread for making decorative stitches.
 |
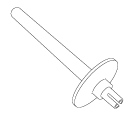 |
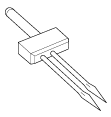
| Twin needle | Extra spool pin |
- Use only twin needles that have been made for this machine (part code: X57521-021:2.0/75 with a 2 mm width). Other needles could break and damage the machine.
- Never use bent needles. Bent needles can easily break, possibly resulting in injuries.
The twin needle and extra spool pin are available as optional accessories to be purchased separately.
Depending on the model you purchased, the following accessory may be included with your machine.
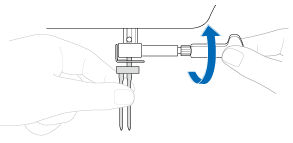
Attaching the twin needle
Attach the twin needle in the same way as a single needle. Refer to How do I change the needle?
The flat side of the needle should face toward the back and the rounded side should face toward you.
Attaching the extra spool pin
Put the extra spool pin in the hole on the top of the machine. Put the second spool of thread onto the extra spool pin.
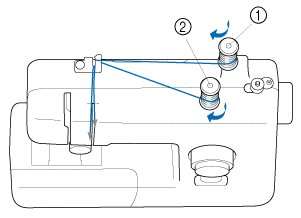 |
(1) First spool (2) Second spool |
Twin needle threading
You should thread each needle separately.
Models equipped with a needle threader
You cannot use the needle threader to thread the twin needle. Instead, thread the twin needle by hand, from front to back. Using the needle threader may damage the machine.
-
Use the thread from the first spool to thread the machine to the needle bar thread guide.
The path for threading the machine to the needle bar thread guide is the same as for normally threading the machine (for a single needle). Refer to How do I thread my machine?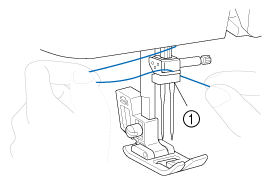
(1) Needle bar thread guide 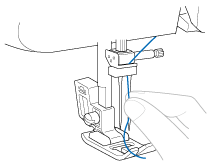
-
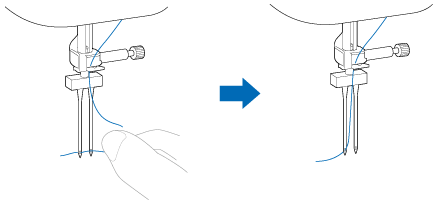
Thread the left needle from front to back.
-
Use the thread from the second spool to thread the machine to the thread take-up lever.
The path for threading the machine to the thread take-up lever is the same as for normally threading the machine (for a single needle). Refer to How do I thread my machine?
-
Thread the right needle from front to back.
Do not pass the thread behind the needle bar thread guide.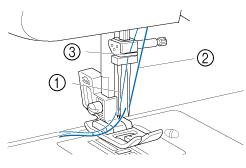
(1) Left needle thread passes through the needle bar thread guide.
(2) Right needle thread passes in front of the needle bar thread guide.
(3) Needle bar thread guide -
Attach zigzag foot “J”.
For details on changing the presser foot, refer to How do I remove or attach the presser foot?When using the twin needle, be sure to attach zigzag foot “J”, otherwise the needle may break or the machine may be damaged. -
Turn on the machine.Do not turn on the machine while pressing down the foot controller. The machine may start unexpectedly and cause personal injury or damage to the machine.
-
Select the stitch appropriate for the area to be sewn.
When using a twin needle, be sure to use a stitch width of 3 or less.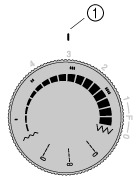
(1) Mark After selecting a stitch, slowly turn the handwheel toward you (counterclockwise) and check that the needle does not touch the presser foot. If the needle hits the presser foot, the needle may bend or break.
-
Start sewing.
Two lines of stitching are sewn parallel to each other.
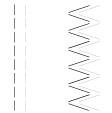
When changing the sewing direction, be sure to raise the needle from the fabric, and then raise the presser foot lever and turn the fabric. Otherwise the needle may break or the machine may be damaged.
Content Feedback
Please note this form is used for feedback only.
Please do not enter contact information or any other personal information here.
(We will not respond to any Feedback you send us.)