JA20
FAQs & Troubleshooting |
JA20
Date: 18/11/2015 ID: faqh00000017_005
How do I sew buttonholes?
Making a buttonhole
- It is recommended to practice making a buttonhole on a scrap piece of fabric before attempting it on your project.
- Using tailor’s chalk to mark the position and length of the buttonhole on the fabric is also recommended.
Step A: Bar Tack
-
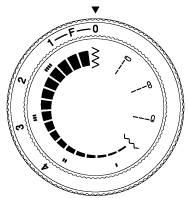
Set the stitch length to 0, stitch width to 5.
-
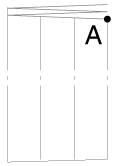
Lower the presser foot over the top right corner of the buttonhole mark and sew 3 - 5 stitches.
-
Stop the machine when the needle is not in the fabric, or when the needle is in the fabric on the right edge of the stitch (position A). (Turn the handwheel counterclockwise if necessary.)
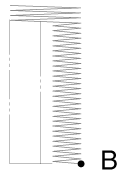
Step B: Right Row
-
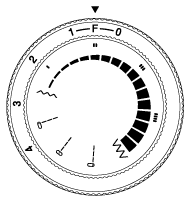
Set the stitch length to between 0 and 1 (F), stitch width to 2.
-
Sew the predetermined length of the buttonhole to the other end.
-
Stop the machine when the needle is not in the fabric, or when the needle is in the fabric on the right edge of the stitch (position B). (Turn the handwheel counterclockwise if necessary.)
Step C: Final Bar Tack
-
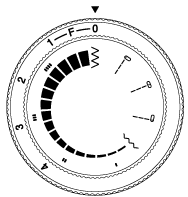
Set the stitch length to 0, stitch width to 5.
-
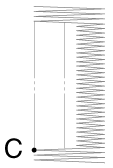
Sew 3-5 stitches.
-
Stop the machine when the needle is in the fabric on the left edge of the stitch (position C). (Turn the handwheel counterclockwise if necessary.)
Step D: Left Row
-
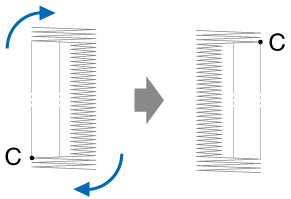
Raise the presser foot. Then, turn the fabric 180 degrees using the needle as an axis.
-
Lower the presser foot. Then, turn the handwheel counterclockwise to move the needle to the right side.
-
Raise the presser foot. Then, align the needle tip with the right edge of the bar tack (position C) by adjusting the fabric position.
-
Set the stitch length between 0 and 1 (F), stitch width to approximately 2.
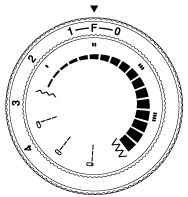
-
Lower the presser foot. Then, sew until the needle reaches the right corner of the other back tack (position D).
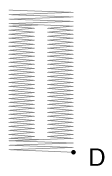
Securing the Stitching and Cutting the Buttonhole
-
To secure the stitching, turn the material 90 degrees counterclockwise and sew straight stitches to the end of the front bar tack of the buttonhole.
-
Remove the material from the machine. We recommend that you put pins across both ends of the buttonhole to prevent the stitches from being cut.
-
Cut an opening in the middle of the buttonhole with the seam ripper tool. Be careful not to cut through any stitches.
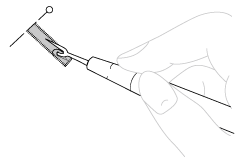
JA20
If you need further assistance, please contact Brother customer service:
Content Feedback
To help us improve our support, please provide your feedback below.
Step 1: How does the information on this page help you?
Step 2: Are there any comments you would like to add?
Please note this form is used for feedback only.