Innov-is NV1800Q
FAQs & Troubleshooting |
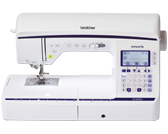
Innov-is NV1800Q
Date: 20/03/2015 ID: faqh00000632_003
How do I remove or attach the presser foot ?
- Use the presser foot appropriate for the type of stitch that you wish to sew, otherwise the needle may hit the presser foot, causing the needle to bend or break.
- Only use presser feet designed specifically for this machine. Use of any other presser foot may result in injuries or damage to the machine.
-
Press
 (Needle position button) once or twice to raise the needle.
-
Lower the presser foot lever.
(1) presser foot lever -
Press
 .
.
-
If is pressed while the presser foot is raised, an error message appears. Lower the presser foot.
-
The screen changes, and all keys and operation buttons are locked (except ).
-
If
-
Raise the presser foot lever.
(1) Presser foot lever -
Press the black button at the back of the presser foot holder in order to remove the presser foot.
(1) Black button (2) Presser foot holder
-
Place a different presser foot below the holder so that the presser foot pin is aligned with the notch in the holder.
(1) Presser foot holder (2) Notch
(3) Pin
(4) Presser foot type
-
Slowly lower the presser foot lever so that the presser foot pin snaps into the notch in the presser foot holder.
(1) Presser foot lever (2) Presser foot holder
(3) Notch
(4) Pin
-
Raise the presser foot lever to check that the presser foot is securely attached.

(1) Presser foot lever -
Press to unlock all keys and buttons.

-
When a stitch is selected, the icon for the presser foot that should be used appears in the screen.
Check that the correct presser foot is attached before starting to sew. If the wrong presser foot is installed, turn off the machine, attach the correct presser foot, turn machine back on and then select the desired stitch again.


Zigzag foot "J" 
Monogramming foot “N”

Overcasting foot “G”

Buttonhole foot “A”

Blind stitch foot “R”

Button fitting foot “M”

Side cutter “S”
- For details on the presser foot that should be used with the selected stitch, refer to “Stitch Setting Chart” in the operation manual.
-
When a stitch is selected, the icon for the presser foot that should be used appears in the screen.
Related FAQs
Innov-is NV1800Q
If you need further assistance, please contact Brother customer service:
Content Feedback
To help us improve our support, please provide your feedback below.
Step 1: How does the information on this page help you?
Step 2: Are there any comments you would like to add?
Please note this form is used for feedback only.