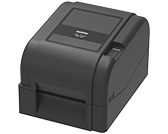
TD-4420TN
FAQs & Troubleshooting |

TD-4420TN
Date: 13/03/2019 ID: faqp00100471_000
How to execute the printer configuration (Self-test) to debug
To print the printer configuration (Self-Test), do the following:
- Turn off the printer.
- Press and hold the Feed/Pause Button and then turn on the printer.
-
Release the button when the LED is flashing in amber (5 times).
The LED color will change in the following order:
Amber > Red (5 times) > Amber (5 times) (Release the button here) > Green (5 times) > Green/Amber (blinks 5 times alternately) > Red/Amber (blinks 5 times alternately) > Green (lit) -
The printer calibrates the sensor and detects the label length, prints the internal settings, and then enters the dump mode.
To turn off the dump mode after debugging, please turn the printer off and back on again.To select the sensor for calibration, send the correct command to the printer:
- For the Gap Sensor: the GAP command
- For the Black Mark sensor: the BLINE command
You can also print the printer configuration (Self-test) by using the BPM (Brother Printer Management Tool).
TD-4420TN
If you need further assistance, please contact Brother customer service:
Content Feedback
To help us improve our support, please provide your feedback below.
Step 1: How does the information on this page help you?
Step 2: Are there any comments you would like to add?
Please note this form is used for feedback only.