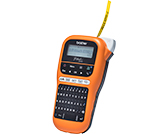
PT-E110
FAQs & Troubleshooting |

PT-E110
Date: 10/04/2020 ID: faqp00001475_013
How do I set tape margins and what features are they?
To set the tape margins, do the following steps:
-
Press the [Menu] key.
-
Press the Cursor key (
 ) to select [Margin], and then press the [OK] key or the Enter key (
  ).
). -
Press the Cursor key to select the margin you want to set from among [Full], [Half], [Narrow] and [Chain Print].
-
Press the [OK] key or the Enter key.
<Full / Half / Narrow>
Use one of these options to customize the margin length before and after your text.
| LCD | Printout | |
| Full |  |
 |
| Half |  |
 |
| Narrow |  |
 |
<Chain Print> (tape-saving option)
Use this option to print multiple different labels with narrow margins. This option saves tape.
- Enter text.
-
Press the [Print] key (
 /
/  ).
). - When [Feed OK?] appears on the LCD, press the [Esc] key to change the text.
- Clear the text, enter new text for the next label, and then press the [Print] key.
- When [Feed OK?] appears on the LCD after the last label is printed, press the [OK] key.
- [Full], [Half] and [Chain Print] are not available for the Cable Wrap, Cable Flag and Faceplate functions.
-
When you use [Chain Print], feed the tape (Shift key
 + Preview key
  /
/  ) before using the cutter, otherwise part of the text may be cut off.
 - Do not pull the tape. This may damage the tape cassette.
- If you select [Half] or [Narrow], the printed dots (:) indicate the end of the label. Cut along the printed dots (:) with scissors.
PT-E110
If you need further assistance, please contact Brother customer service:
Content Feedback
To help us improve our support, please provide your feedback below.
Step 1: How does the information on this page help you?
Step 2: Are there any comments you would like to add?
Please note this form is used for feedback only.