FS60X
FAQs & Troubleshooting |
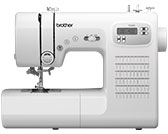
FS60X
Date: 31/07/2020 ID: faqh00101023_002
Tips for sewing an even seam allowance
To sew an even seam, start sewing so that the seam allowance is to the right of the presser foot, and the edge of the fabric is aligned with either the right edge of the presser foot or a marking on the needle plate.
Changing the needle position
The needle position used as the baseline is different for the straight stitch (left needle position) and the straight stitch (middle (center) needle position).
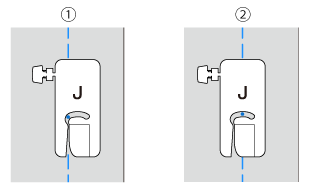 |
(1) Straight stitch
(2) Straight stitch |
When the stitch width of the straight stitch (left needle position) is set to its standard setting (0.0 mm), the distance from the needle position to the right side of the presser foot is 12 mm (1/2 inch). If the stitch width is changed (between 0 and 7.0 mm (1/4 inch)), the needle position will also change. By changing the stitch width and sewing with the right side of the presser foot aligned with the edge of the fabric, a seam allowance can be sewn with a fixed width.
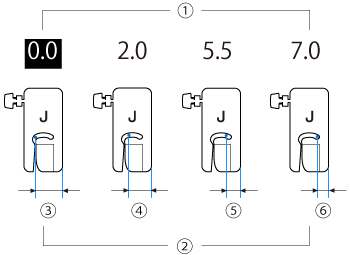 |
(1) Stitch width setting (2) Distance from the needle position to the right side of the presser foot (3) 12.0 mm (1/2 inch) (4) 10.0 mm (3/8 inch) (5) 6.5 mm (1/4 inch) (6) 5.0 mm (3/16 inch) |
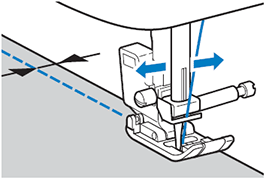
- For details of needle position, refer to "Adjusting the needle position" below.
Adjusting the needle position
With the straight stitch and the triple stretch stitch, the needle position can be adjusted.
Pressing "+" of the stitch width keys moves the needle to the right; pressing "–" of the stitch width keys moves the needle to the left.
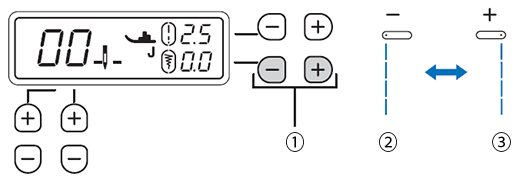
| (1) Stitch width keys | (2) Left needle position | (3) Right needle position |
Aligning the fabric with a needle plate marking
The markings on the needle plate show the distance from the needle position of a seam sewn with the straight stitch (left needle position). Sew while keeping the edge of the fabric aligned with a marking on the needle plate. The distance between the markings in the upper scale is 1/8 inch (3 mm) and the distance between the markings in the grid is 5 mm (3/16 inch).
For stitches with a left needle position (Stitch width: 0.0 mm)
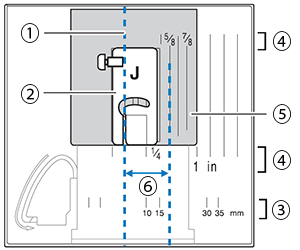 |
(1) Seam (2) Presser foot (3) Millimeters (4) Inches (5) Needle plate (6) 16 mm (5/8 inch) |
Aligning the fabric with zigzag foot "J"
The marking on zigzag foot "J" can be used to sew about 5 mm (3/16 inch) from the edge of the fabric. When using this feature, select a straight stitch, and set the stitch width to 2.0 mm.
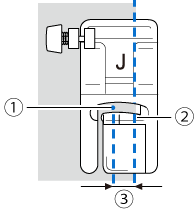 |
(1) Stitch width 2.0 mm (2) Marking (3) 5 mm (3/16 inch) |
FS60X
If you need further assistance, please contact Brother customer service:
Content Feedback
Please note this form is used for feedback only.