TP-M5000N
FAQs & Troubleshooting |
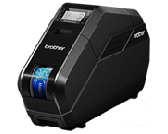
TP-M5000N
Date: 01/09/2024 ID: faqp00100094_002
Setting up the machine
To setup the machine, please follow the steps below:
> Installing the tape cassette
> Installing the ink ribbon cassette
> Installing the paper core holder
-
Plug the power cord into the power cord jack on the machine.
 Unbundle the power cord before use.
 - Plug the power cord into the power outlet.
-
Press the power button (
 ) on the machine to turn it on. The power indicator will illuminate green, and the machine is in standby.
When printing on fabric ribbon, use the fabric ribbon cassette.
* The tape cassette is used in the procedures and illustrations.
-
Open the top cover and bottom cover of the machine. Press the open buttons (1) to open the covers.

-
Make sure that there is no slack in the tape cassette.
-
If there is slack in the tape, turn the reel as shown to remove any slack.

-
If there is slack in the backing paper, turn the reel in the direction of the arrow to remove any slack.

-
If there is slack in the tape, turn the reel as shown to remove any slack.
-
Make sure that the end of the tape (or fabric ribbon) extends from the tape cassette (or fabric ribbon cassette).

-
Hold the tape (or fabric ribbon) cassette with both hands, and then insert it into the machine with the tape (or fabric ribbon) reel toward the back of the machine.
 Do not directly touch the tape or fabric ribbon with your fingers.
Installing the ink ribbon cassette
-
Make sure that there is no slack in the ink ribbon cassette. If there is slack in the ink ribbon, turn the gear in the direction of the arrow to remove any slack.

- Hold the ink ribbon cassette as shown.
- Do not directly touch the ink ribbon with your fingers.
-
Install the ink ribbon cassette on top of the tape cassette.
Align on the ink ribbon cassette with
  on the machine.

Installing the paper core holder
* The paper core holder for tape is used in the procedures and illustrations.
-
Remove the rim of the paper core holder.

-
Adjust the paper core holder to the width of the paper core to be used.
Use the marks on the paper core holder as a guide.
 If the paper core holder is locked, rotate it in the direction of the arrow until it is unlocked.

-
Rotate the rim of the paper core holder in the direction of the arrow until it locks into the slot of the paper core holder.

- Slide the paper core onto the paper core holder.
-
Attach the rim of the paper core holder.
Firmly attach the rim so that there is no gap between the paper core and the rims of the paper core holder.
 If there is a gap between the paper core and the rims of the paper core holder, the tape will be incorrectly wound. Make sure that there are no gaps.

-
With the lock (1) of the paper core holder on the left, insert it into the machine.

-
Pull the lock of the paper core holder toward you until it locks into place.

-
Pull the tape (or fabric ribbon) from the tape (or fabric ribbon) cassette, and then securely affix it to the paper core.
Tape Cassette Fabric ribbon cassette 

Note: To secure the ribbon to the paper core, use a small piece of tape.- If the tape or fabric ribbon is not securely affixed, it may come off the paper core and be incorrectly wound.
-
Correctly align the tape or fabric ribbon before affixing it. If the tape or fabric ribbon is affixed at an angle, it may wrinkle at the edge of the paper core holder and be incorrectly wound.

-
When affixing the tape (or fabric ribbon) to the paper core, make sure that the tape (or fabric ribbon) does not attach to the tape (or fabric ribbon) cassette guide (1). Otherwise, the tape (or fabric ribbon) will not wind on the paper core, resulting in a malfunction.

-
Close the top cover and bottom cover, and then press the set button (
 ).
).
Press down on the covers until they click into place.
When the tape (or fabric ribbon) is installed, a test print is performed, and the tape (or fabric ribbon) is wound on the paper core.Look through the small window of the machine at the test-printed tape (or fabric ribbon) wound on the paper core to check the print condition and print position (left and right margins, etc.).Good sample Bad sample 

If the print position is shifted, adjust it by clicking Device settings - Print Position Adjustment of the “Printer Setting Tool”. For details, see “I want to correct a shift in the print position.”Tape cassettes, fabric ribbon Cassettes, ink ribbon cassettes and paper cores are consumables to be purchased separately.
Movie: Setting up the printer
*The video clip is being streamed from YouTube.
TP-M5000N
If you need further assistance, please contact Brother customer service:
Content Feedback
Please note this form is used for feedback only.