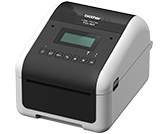
TD-4550DNWB/ 4550DNWB(FC)
FAQs & Troubleshooting |

TD-4550DNWB/ 4550DNWB(FC)
Date: 02/08/2024 ID: faqp00100492_000
The print result does not improve even if I adjust the print density.
Try to adjust the print density using the [Energy Rank] setting in the Paper Size Setup or the [Print Density] or [Auto Speed Configuration] setting in the Device Settings:
-
Update the firmware using the Firmware Update Tool.
You can download the Firmware Update Tool from the [Downloads] section of this website.
-
Open the Device Settings in the Printer Setting Tool.
Refer to "Using the Printer Setting Tool (for Windows)".
-
Change the setting for [Auto Speed Configuration], and then click [Apply].
To increase the print density: On
To decrease the print density: Off
If you want to fine tune, also change the value for [Print Density].
Available values: -5 - +5 - Open the Paper Size Setup in the Printer Setting Tool.
-
Select the currently registered paper size and click [Edit...].

-
Click [Advanced Printing Adjustments...].

-
Change the value for [Energy Rank], and then click [OK].
Available values: 1 – 30

-
Try to print again and check the print result.
If the print result is not as expected, repeat steps 4 – 8.
Related FAQs
TD-4210D, TD-4410D, TD-4420DN/ 4420DN(FC), TD-4520DN, TD-4550DNWB/ 4550DNWB(FC)
If you need further assistance, please contact Brother customer service:
Content Feedback
To help us improve our support, please provide your feedback below.
Step 1: How does the information on this page help you?
Step 2: Are there any comments you would like to add?
Please note this form is used for feedback only.