MFC-J5910DW
FAQs & Troubleshooting |
MFC-J5910DW
Date: 06/29/2011 ID: faq00000024_006
How do I load paper?
Follow the steps listed below:
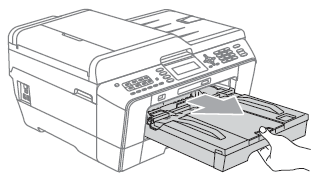
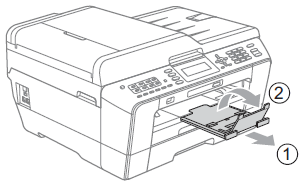
- Pull the paper tray completely out of the machine.
- If the paper support flap (1) is open, close it, and then close the paper support (2).

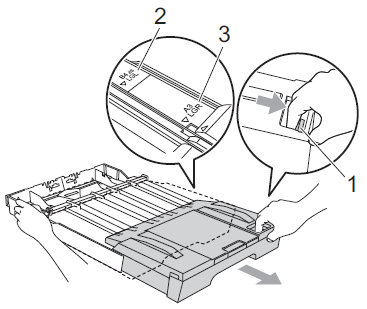
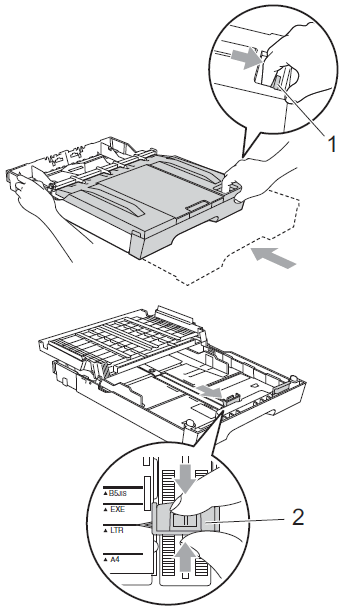
- When you are using Legal, Ledger or A3 size paper, press the universal guide release button (1) as you slide out the front of the paper tray. Make sure that when using Legal or Ledger or A3 size paper, the triangular mark on the output paper tray cover is aligned with the line indicating Legal (2) or Ledger or A3 (3) size, as shown in the illustration.
- If you are using A5 or smaller size paper, make sure that the paper tray is not extended.
- (MFC-J6710DW, MFC-J6910DW and MFC-J5910DW )
When you load a different paper size in a tray, you will need to change the paper size setting in the machine at the same time.
- If the paper support flap (1) is open, close it, and then close the paper support (2).
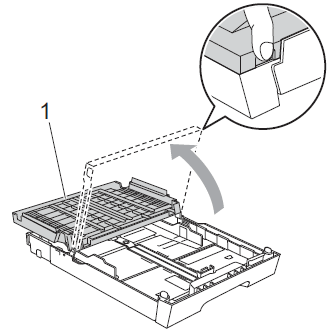
- Open the output paper tray cover (1).
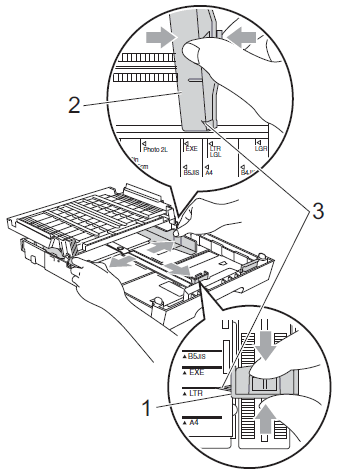
- With both hands, gently press and slide the paper length guide (1) and then the paper side guides (2) to fit the paper size.
Make sure that the triangular marks (3) on the paper length guide (1) and paper side guides (2) line up with the mark for the paper size you are using.
- Fan the stack of paper well to avoid paper jams and misfeeds.
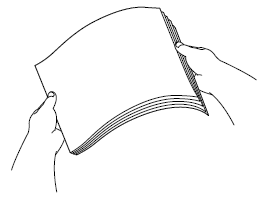
Always make sure that the paper is not curled or wrinkled.
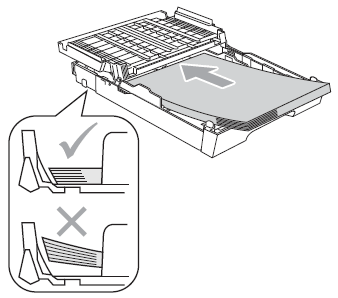
- Gently put the paper into the paper tray print side down and top edge in first.
Check that the paper is flat in the tray.
- When adding new sheets of paper into the tray, DO NOT just slide the new sheets of paper on top of the paper in the tray. We recommend that you set new paper after the last paper is fed in the paper feed tray and the paper tray is empty.
- When you put Photo L size into the paper tray, you need to release the hinges on both sides of the output paper tray cover, and push the cover over. And then slide the paper length guide.

- When adding new sheets of paper into the tray, DO NOT just slide the new sheets of paper on top of the paper in the tray. We recommend that you set new paper after the last paper is fed in the paper feed tray and the paper tray is empty.
- Gently adjust the paper side guides to fit the paper with both hands.
Make sure the paper side guides touch the sides of the paper.
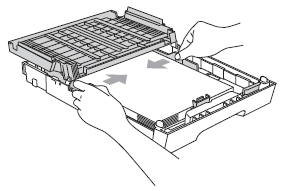
Be careful that you do not push the paper in too far; it may lift at the back of the tray and cause feed problems.
- Close the output paper tray cover.
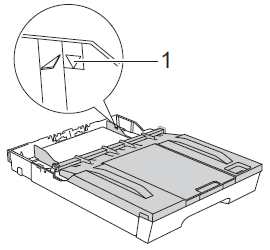
Check that the paper is flat in the tray and below the maximum paper mark (1).
Over filling the paper tray may cause paper jams.
- Slowly push the paper tray completely into the machine.

DO NOT push Tray #1 into the machine too quickly. Doing this may cause injury to your hand by trapping it between Tray #1 and Tray #2. Please push Tray #1 in slowly.
- While holding the paper tray in place, pull out the paper support (1) until it clicks, and then unfold the paper support flap (2).
Before you shorten Tray, take the paper out of the tray. Then shorten the tray by pressing the universal guide release button (1). Adjust the paper length guide (2) to fit the paper size you are going to use. Then put the paper into the tray.
MFC-J5910DW, MFC-J6510DW, MFC-J6710DW, MFC-J6910DW
If you need further assistance, please contact Brother customer service:
Content Feedback
To help us improve our support, please provide your feedback below.
Step 1: How does the information on this page help you?
Step 2: Are there any comments you would like to add?
Please note this form is used for feedback only.