MFC-9840CDW
FAQs & Troubleshooting |
MFC-9840CDW
Date: 01/29/2014 ID: faq00002256_003
How do I clean the drum unit?
If you have print quality problems, clean the drum unit as follows:
DO NOT use flammable substances, any type of spray, or an organic solvent/liquid that contains alcohol or ammonia to clean the inside or outside of the machine.

- Turn off the machine's power switch. Unplug the telephone line cord first (for MFC users), disconnect all cables, and then unplug the power cord from the AC power outlet.
- Press the front cover release button and then open the front cover.
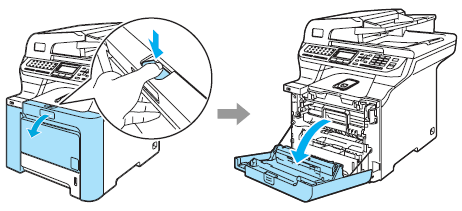
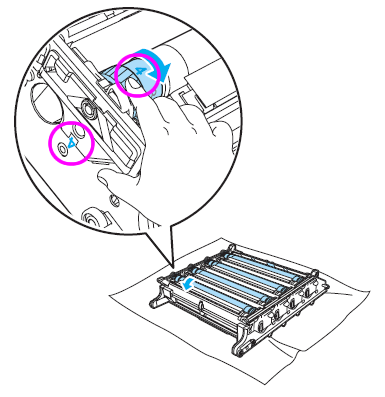
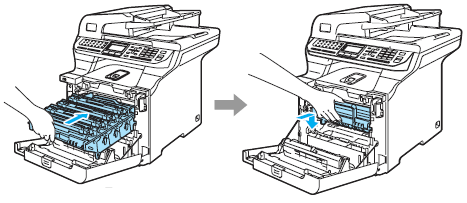
- Hold the green handle of the drum unit. Lift the drum unit up and then pull it out until it stops.
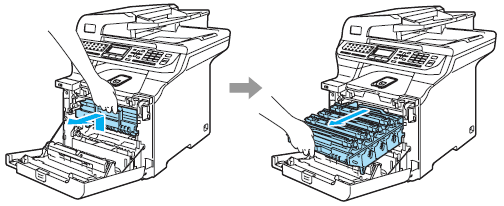
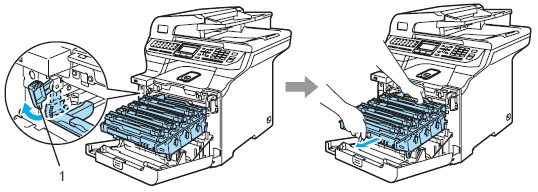
- Release the gray lock lever (1) that is on the left side of the machine. Lift the front of the drum unit and pull the drum unit completely out of the machine using the green handles on the drum unit.
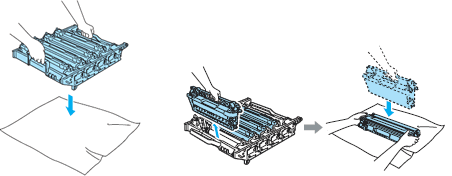
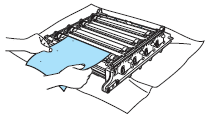
- We recommend that you place the drum unit on a clean, flat surface with a piece of disposable paper underneath it in case you accidentally spill or scatter toner.
-
We recommend that you place the toner cartridges on a clean, flat surface with a piece of disposable paper underneath it in case you accidentally spill or scatter toner.
- Handle the toner cartridge carefully. If toner scatters on your hands or clothes, wipe or wash it off with cold water at once.
-
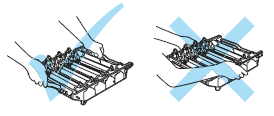
Hold the handles of drum unit when you carry it. DO NOT hold the sides of the drum unit.
-
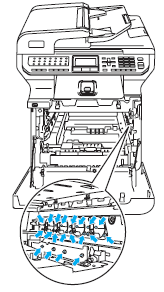
To avoid print quality problems, DO NOT touch the shaded parts shown in the illustrations.

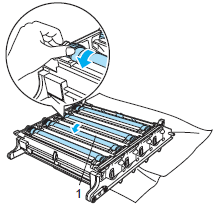
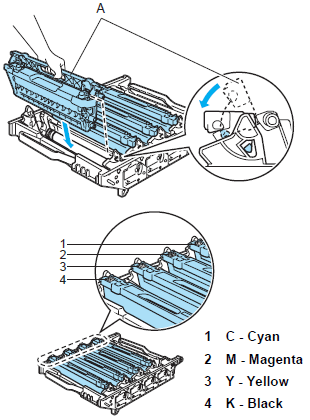
- Hold the handle of the toner cartridge and pull it out of the drum unit. Repeat this for all of the toner cartridges.

To prevent damage to the machine from static electricity, DO NOT touch the electrodes shown in the illustration.
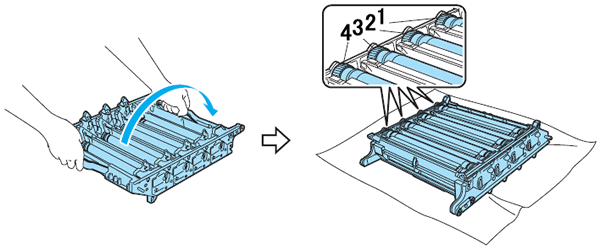
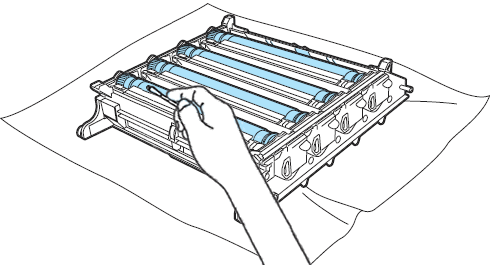
- Turn the drum unit over by holding the handle. Make sure that the four drum unit gears are on the left side and the drum unit gear "1" is located furthest away from you. The numbers can be found on the drum unit gear.
- See the print sample to identify the color causing the problem. The color of the spots is the color of the drum you should clean. For example, if the spots are cyan, you should clean the drum for cyan. Put the print sample in front of the drum, and the find the exact position of the poor print.
- Turn the drum unit gear toward you by hand while looking at the surface of the drum (1).
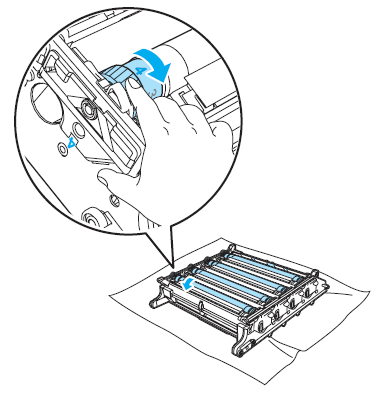
- When you have found the mark on the drum that matches the print sample, wipe the surface of the drum gently with a cotton swab until the dust or paper powder on the surface comes off.
- The drum is photosensitive so DO NOT touch it with your fingers.
- DO NOT clean the surface of the photosensitive drum with a sharp object.
- DO NOT use a scrubbing or wiping motion because this might damage the drum.
- Turn the drum unit gear toward you by hand to return it to the home position. The home position of each drum can be identified by matching the number on the drum unit gear to the same number on the side of the drum unit as shown in the illustration.
-
Make sure that the number on each of the four drum unit gears matches the corresponding number on the side of the drum unit.
- Hold the handle of the toner cartridge and slide the toner cartridge into the drum unit. Make sure that you match the toner cartridge color to the same color label on the drum unit, and make sure that you fold down the toner cartridge handle (A) once the toner cartridge is in place. Repeat this for all the toner cartridges.
-
Put the drum unit back in the machine as follows.
-
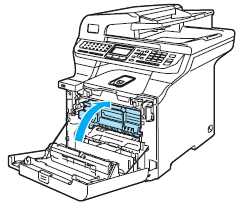
Make sure that the gray lock lever (1) is in the up position and put the drum unit in the machine. Push down the gray lock lever (1).
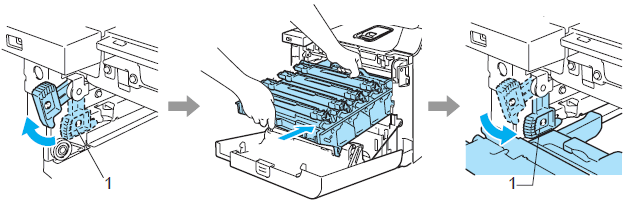
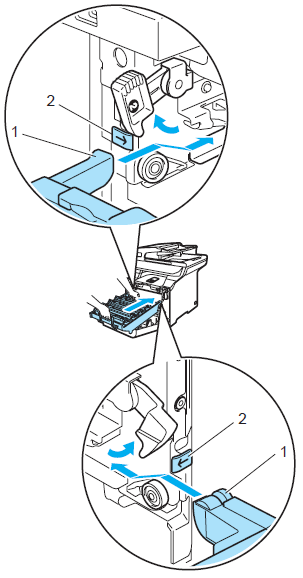
When you put the drum unit in the machine, match the green guides (1) of the drum unit handle to the green arrows (2) on both sides of the machine.
-
Push the drum unit in until it stops.
-
Make sure that the gray lock lever (1) is in the up position and put the drum unit in the machine. Push down the gray lock lever (1).
- Close the front cover of the machine.
- Plug the machine's power cord back into the AC power outlet first, and reconnect all cables and telephone line cord (for MFC users). Turn on the machine's power switch.
Content Feedback
To help us improve our support, please provide your feedback below.
Step 1: How does the information on this page help you?
Step 2: Are there any comments you would like to add?
Please note this form is used for feedback only.