QL-1050
FAQs & Troubleshooting |
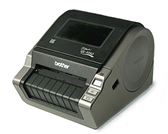
QL-1050
Date: 04/30/2020 ID: faqp00001073_001
How do I install/change the DK roll?
To install a new DK roll:
-
Press the ON/OFF button to turn the printer off. Pull up the levers on both sides under the top cover to open it.

-
Place the spool into the spool guides in the DK Roll compartment.

Make sure that the spool arms are inserted firmly in the spool guides on the left and right sides. Insert the spool with the DK Roll located on the right side of the printer.
-
Thread the end of the DK roll under the protruding portion and gap in the cutter unit.

Thread the end of the DK roll in until it can be seen from the other side and close the cover.
Press the ON/OFF button to turn the printer on, and then press the Feed button to set the roll. - Close the head cover until it clicks on both sides.
To remove a DK roll:
- Press the ON/OFF button to turn the printer off. Pull up the levers on both sides under the top cover to open it.
- Hold the DK roll by the spool arms pull the inserted DK Roll up and out of the machine.
- Close the head cover until it clicks on both sides.
QL-1050, QL-1050N
If you need further assistance, please contact Brother customer service:
Content Feedback
To help us improve our support, please provide your feedback below.
Step 1: How does the information on this page help you?
Step 2: Are there any comments you would like to add?
Please note this form is used for feedback only.