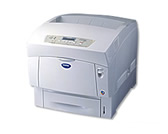
HL-4000CN
FAQs & Troubleshooting |

HL-4000CN
Date: 09/29/2011 ID: faq00002354_000
Print on custom-size (Long) paper.
Using the multi-purpose tray enables you to print custom-size paper or 'long' paper, longer than legal portrait (355.6 mm (14 in.)).
The paper sizes suitable for use with this printer are as follows:
- Single-sided printing: Width 90-216 mm (3.5 - 8.5 in.); Length 139.7-900.0 mm (5.5 - 35.4 in.)
- 2-Sided(Duplex) printing: Width 90-216 mm (3.5 - 8.5 in.); Length 139.7-355.6 mm (5.5 - 14 in.)
Feeding custom-size paper sidewise is not possible. Always feed this type of paper lengthwise.
To print on custom-size paper, you must set the paper size as a user defined size first. Follow the procedure below:
Setting a User Defined Size
With a Macintosh computer, you need to set the user defined size while executing a printing command from a program. Continue to "How to Print". In Windows, you need to set the user defined size before launching the printing command from a program, using the following procedure: The following example is for Windows 98.
- On the Start menu, point to Settings and click Printers. The Printers window opens.
- Click the appropriate printer and on the File menu, click Properties. The Properties dialog box opens.
- Click the Default Settings tab.
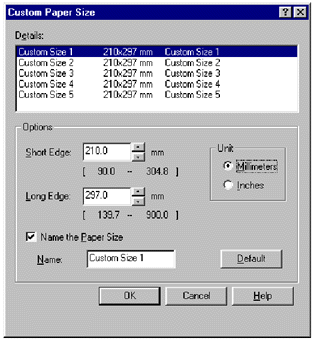
- Click Custom Paper Size. The Custom Paper Size dialog box appears.
- Select one of the five paper sizes.

For details of the Custom Paper Size dialog box settings, refer to Help.
- When you finish making the settings, click OK in the Custom Paper Size dialog box.
- In the Properties dialog box, click OK. The user defined size is now set.
How to Print
Follow the steps below to print on custom-size (long) paper.
- Adjust the paper guide to the width of the paper that you are about to use.

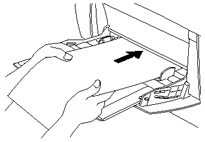
- With the printed side facing down, set the paper into the multi-purpose tray so that it lightly touches the feeding slot.
- Launch printing from your program after setting the paper. Set the items for "Printer Driver Settings (for Custom-size (Long) Paper)" as shown.
When printing on long paper, after giving the print command, support the paper with your hands while it feeds into the printer.
Printer Driver Settings
(for Custom-size (Long) Paper)
Windows settings :
|
Tab |
Item |
Setting |
| Paper/Output | Paper Size | A paper size selected from Custom Size 1 -Custom Size 5 in the Default Settings tab in the printer driver dialog box. |
| Paper Tray | MP Tray |
Macintosh settings :
|
Dialog Box |
Item |
Setting |
| Paper Settings | Paper/Output | Set the paper size in the Custom Paper Size dialog box in [Page Sizes]. |
| Custom Paper Size | long, short | Set the paper size that you want to use. |
| Printer Settings | Paper Tray | MP Tray |
For details about individual printer driver items, refer to Help.
HL-4000CN
Do you need any further assistance?
Content Feedback
Please note this form is used for feedback only.