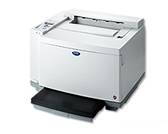
HL-3450CN
FAQs & Troubleshooting |

HL-3450CN
Date: 01/29/2014 ID: faq00002296_000
How do I replace the Paper Discharger?
Follow the steps below;
- User replacement of some of these parts is NOT recommended.
- For replacement of the Paper Feeding Roller, Separator Pad and the Transfer Drum, consult your local dealer/retailer.
- Actions 6 to 9 should only be carried out by your dealer or Brother authorized service center when they have replaced the Paper Feeding Roller, Separator Pad and the Transfer Drum.
-
Press the Power button to turn the printer Off, and then unplug the printer.
-
Open the Rear Access Cover.
-
Remove the Paper Discharger from the Transfer Unit by lightly pressing it down and then sliding it to the right to release it from the catches. Hold the right hand side of the Discharging Unit and lift it up to remove it.

-
Install the new Paper Discharger into the Transfer Unit in the reverse order that you removed it.

-
Plug the power cord into the power outlet and press the Power button to turn on the printer.
-
Press any of the Menu buttons (+, -, Set or Back) to take the printer Off Line.
-
Press + or - until "RESET MENU" appears.
-
Press Set to proceed to the next menu level, and then press + or - until "PARTS LIFE" appears.
-
Press Set, and then press + until "120K KIT" appears.
-
Press Set, and then press Go. The printer is now in the READY state.
HL-3450CN
If you need further assistance, please contact Brother customer service:
Content Feedback
Please note this form is used for feedback only.