HL-3070CW
FAQs & Troubleshooting |

HL-3070CW
Date: 07/26/2022 ID: faq00002794_016
Configure the Brother machine for a wireless network with a USB or network cable using the Installation CD-ROM
This FAQ explains how to configure your Brother machine for a wireless network using the Wireless setup wizard and a USB or network cable temporarily. (The computer must be on your network.)
If you do not have a USB or network (LAN) cable, you can configure your Brother machine using automatic wireless mode (SecureEasySetup™, Wi-Fi Protected Setup or AOSS™) when your WLAN access point/router supports SecureEasySetup™, Wi-Fi Protected Setup or AOSS™. Click here to see the details of how to configure the Brother machine for a wireless network using automatic wireless mode (SecureEasySetup™, Wi-Fi Protected Setup or AOSS™).
STEP I: Before configuring the wireless settings:
You must know your wireless network settings of the WLAN access point/router. Check and record the current wireless network settings below.
- Network Name (SSID: Service Set ID, ESSID: Extended Service Set ID)
- Network Key (Password, Security Key or Encryption Key, etc.)
How to find the Network Name (SSID, ESSID) and Network Key?
-
See the side of your WLAN access point/router.

- See the documentation provided with your WLAN access point/router.
- The initial Network Name could be the manufacturer's name or the model name.
If you don't know your wireless settings of your WLAN access point/router, click here to see the details of how to find SSID and Network Key.
STEP II: Configure the wireless settings:
Follow the steps below.
NOTE: The screens may differ depending on operating system being used and your Brother machine.
-
Connect the AC power cord to your Brother machine and then connect it to an AC power outlet (electrical socket). Turn on your Brother machine.
DO NOT connect the USB or network cable yet.
-
Turn on your computer.
-
Put the supplied CD-ROM into your CD-ROM drive.
For Windows users
For Macintosh users
If you do not have the CD-ROM, configure your Brother machine using automatic wireless mode (SecureEasySetup™, Wi-Fi Protected Setup or AOSS™) when your WLAN access point/router supports either SecureEasySetup™, Wi-Fi Protected Setup or AOSS™. Click here to see the details of how to configure the Brother machine for a wireless network using automatic wireless mode (SecureEasySetup™, Wi-Fi Protected Setup or AOSS™).
For Windows users:
The opening screen will appear automatically. If prompted, choose your model and language. Continue to Step 4.
NOTE: If the installation screen does not appear automatically, click here to see how to open the installan.
For Macintosh users:
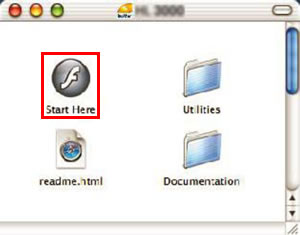
Double-click the HL3000 icon on your desktop. Double-click the Start Here icon. If prompted, choose your model and language. Continue to Step 4.
-
The CD-ROM main menu will appear. Click Install Printer Driver.
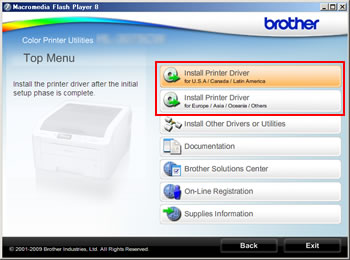
-
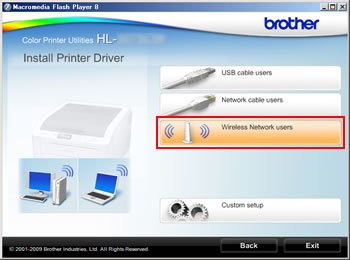
Click Wireless Network users.
NOTE: When the User Account Control screen appears, click Allow or Yes.
-
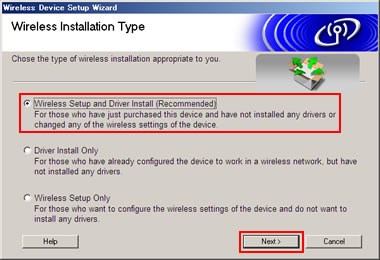
Choose Wireless Setup and Driver Install (Recommended) and click Next.
-
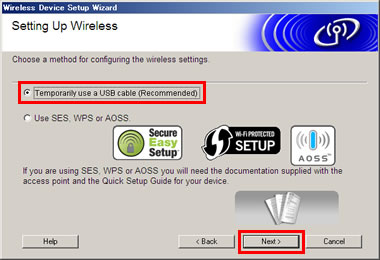
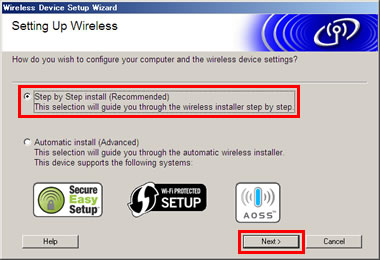
Choose a method for configuring the wireless settings.
For Windows users
For Macintosh users
For Windows users:
If the message, Temporarily use a USB cable (Recommended) appears, choose Temporarily use a USB cable (Recommended) and then click Next. Click here to see the details of how to configure the Brother machine for a wireless network with a USB cable using the Wireless setup wizard on the Installation CD-ROM.
If the message, Step by Step install (Recommended) appears, choose Step by Step install (Recommended) and then click Next. Click here to see the details of how to configure the Brother machine for a wireless network with a network cable using the Wireless setup wizard on the Installation CD-ROM.
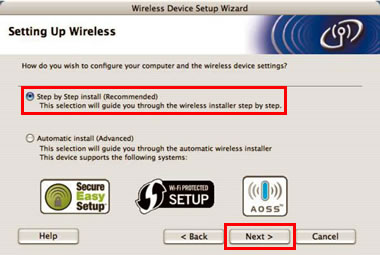
For Macintosh users:
Choose Step by Step install (Recommended) and then click Next. Click here to see the details of how to configure the Brother machine for a wireless network with a network cable using the Wireless setup wizard on the Installation CD-ROM.
Configure the Brother machine for a wireless network with a USB cable using the Wireless setup wizard on the Installation CD-ROM:
-
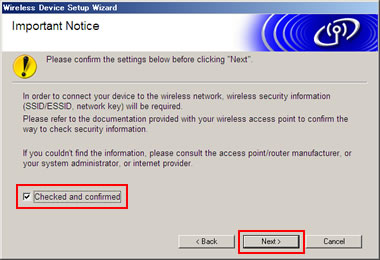
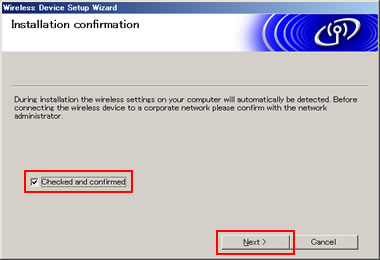
Confirm you have the wireless security information. Check the Checked and Confirmed box and click Next.
-
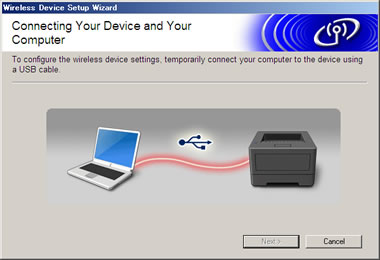
Connect the USB cable to the Brother machine and your computer.
-
Your wireless settings will automatically be detected. One of the following screens will appear depending on your computer environment being used.
Click here if "Installation confirmation" screen appears.
Click here if "Available Wireless Networks" screen appears.
If "Installation confirmation" screen appears:Confirm the displayed information. Check the Checked and Confirmed box and click Next.
Your Network Name (SSID, ESSID) will be displayed. Choose Yes and then click Next.
Continue to Step 7.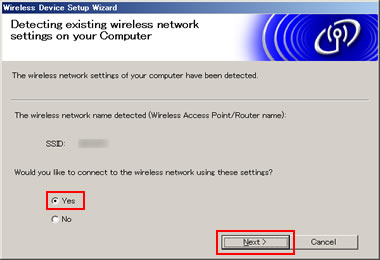
If "Available Wireless Networks" screen appears:The list of currently available wireless network will be displayed. Choose the Network Name (SSID, ESSID) you would like to connect to and then click Next. Continue to Step 5.
If the Network Name (SSID, ESSID) is not displayed in the list, continue to Step 4.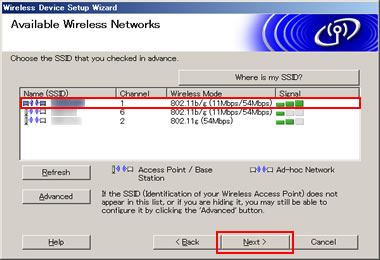
If there are multiple similar Network Names (SSID, ESSID) in the list:
Some WLAN access point/routers can have more than one Network Name (SSID, ESSID). Refer to the instructions provided with your WLAN access point/router.
If so, choose the Network Name (SSID, ESSID) which you used when connecting your computer to the WLAN access point/router. -
If the Network Name (SSID, ESSID) is not displayed in the wireless network list, confirm the following:
After you confirm, click Refresh.- If the WLAN access point/router is turned off, turn on it.
- If your Brother machine is placed too far from your WLAN access point/router or there are obstructions between them, place the Brother machine as close to the WLAN access point/router as possible with minimal obstructions.
- Your Brother machine supports IEEE 802.11b and IEEE 802.11g. Confirm if your WLAN access point/router supports IEEE 802.11b or IEEE 802.11g, and if one of them is enabled.
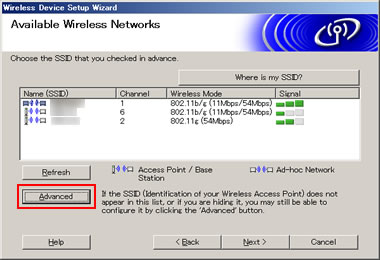
If the WLAN access point/router is in a stealth mode, the Brother machine can not detect the Network Name (SSID, ESSID) automatically. Follow the steps below to add the Network Name (SSID, ESSID) manually.
-
Click Advanced.
-
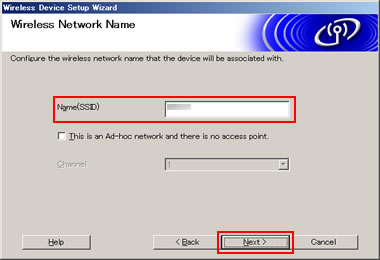
Enter the Network Name (SSID, ESSID) and then click Next.
-
Enter the network information and then click Next. Continue to Step 7.
-
If the following screen appears, follow this step.
If not, continue to Step 6.
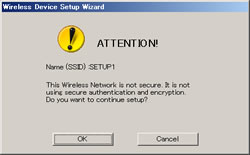
This screen will appear if you choose the Network Name (SSID, ESSID) of the unsecured WLAN access point/router. We recommend that you configure security settings of your WLAN access point/router to prevent unauthorized access to your network.- If you would like to configure security settings of your WLAN access point/router, click Cancel to exit the wizard. After configuring, try to start again from the beginning.
- If not, click OK and then continue to Step 7.
-
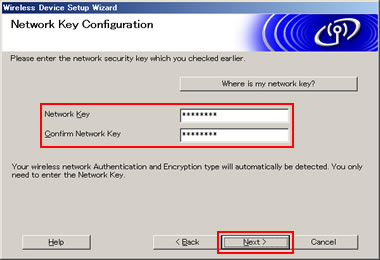
Enter the Network Key and then click Next. (The Network Key is case sensitive.)
-
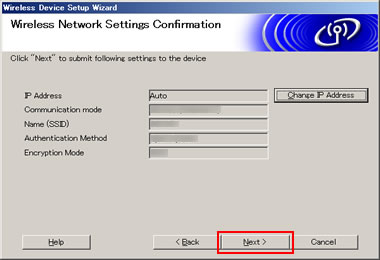
Confirm the settings are correct. Click Next to send the settings to the Brother machine.
- If you would like to change the IP Address, click Change IP Address and set the IP Address manually.
- If you click Cancel, the settings will be disabled.
-
If the wireless connection fails, the connection error screen will appear. Confirm the displayed information and then click Retry to go back to the screen in Step 3. Try to start again from Step 3.
[Example of the error screen]
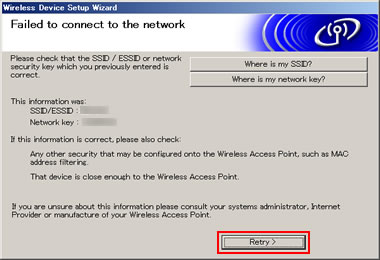
If the connection error screen does not appear, continue to Step 9.
If the connection error still appears after reconfiguring, click Retry again to go back to the screen in Step 3, and click Cancel to exit the wizard.
If the problem continues, contact Brother Customer Service from "Contact Us". -
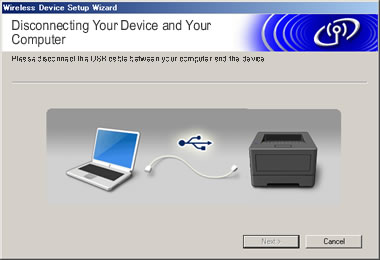
Once the following screen appears, disconnect the USB cable from your computer and the Brother machine.
-
If the following screen appears, the wireless setup is now complete.
Click Next and follow the on-screen instructions to install the printer driver for network connection. Even if you have printed with USB connection, you need to install the printer driver for network connection.
If the printer driver for network connection has already been installed, click Cancel to finish.
Configure the Brother machine for a wireless network with a network cable using the Wireless setup wizard on the Installation CD-ROM:
-
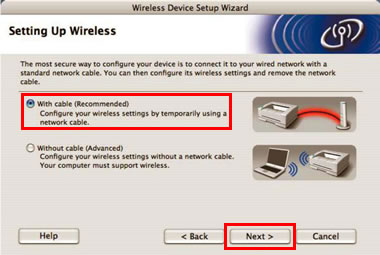
Choose With cable (Recommended) and then click Next.
-
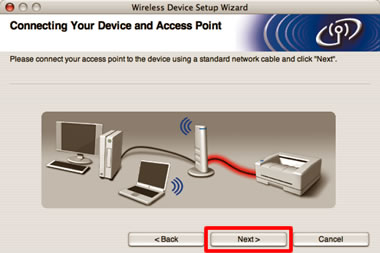
Connect the Brother printer to your access point using a network cable and click Next.
-
Choose the printer you wish to configure, and click Next. If the list is blank, check if the access point and the printer are powered on, and then click Refresh.

- The default Node name starts with "BRN".
- You can find your printer's MAC Address (Ethernet Address) and the IP Address by printing out the Printer Settings Page.
- If you are using personal firewall software, disable it. After the installation, restart your personal firewall software. -
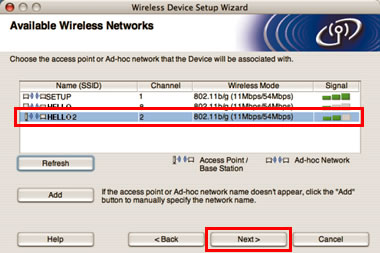
The wizard will search for wireless networks available from your printer. Choose the access point you wish to associate the printer with, and then click Next.
-
SETUP is the default SSID of the printer. Do not choose this SSID.
-
If the list is blank, check that the access point has power and is broadcasting the SSID, and then see if the printer and the access point are within range for wireless communication. Then, click Refresh.
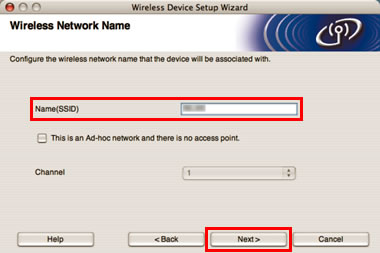
- If your access point is set to not broadcast the SSID you can manually add it by clicking the Add button. Follow the on-screen instructions for entering the Name (SSID), and then click Next.
-
SETUP is the default SSID of the printer. Do not choose this SSID.
-
If the following screen appears, follow this step.
If not, continue to Step 6.
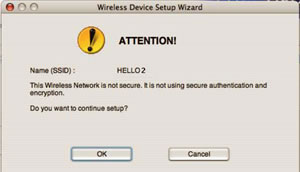
This screen will appear if you choose the Network Name (SSID, ESSID) of the unsecured WLAN access point/router. We recommend that you configure security settings of your WLAN access point/router to prevent unauthorized access to your network.- If you would like to configure security settings of your WLAN access point/router, click Cancel to exit the wizard. After configuring, try to start again from the beginning.
- If not, click OK and then continue to Step 7.
-
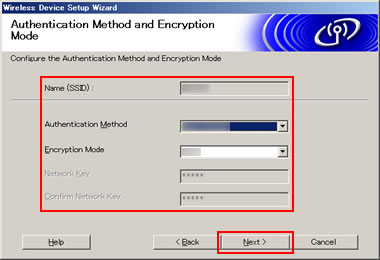
If your network is configured for Authentication and Encryption, the following screen will appear. When configuring your Brother wireless printer, you must configure your printer to match the Authentication and Encryption settings you recorded earlier for your existing wireless network. Choose the Authentication Method and Encryption Mode from the pull-downs in each setting box. Then enter the Network key and Confirm Network Key, and then click Next.
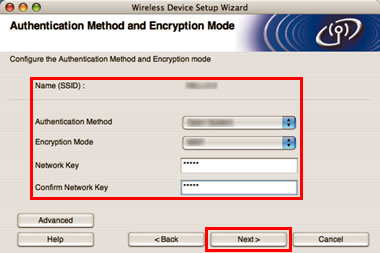
- If you want to setup or configure additional WEP key indexes other than WEP key1, click Advanced.
- If you do not know the Authentication or Encryption settings for your network, click here to see the details of how to find SSID and Network Key.
- If you are using WEP and the printed Network Configuration page in Step 7 shows Link OK in the Wireless Link Status, but the printer is not found on your network, make sure you entered the WEP key correctly. The WEP key is case sensitive. -
Confirm the settings are correct. Click Next to send the settings to the Brother machine. The Network Configuration page will be printed.
- If you would like to change the IP Address, click Change IP Address and set the IP Address manually.
- If you click Cancel, the settings will be disabled.

The control panel settings will be automatically changed to WLAN Enable when the wireless settings are sent to your printer. -
Check the printed Network Configuration page. Choose the status as it is shown for the Wireless Link Status on the Network Configuration page. Click Next.
- If your status is Link OK, go to Step 10.
- If your status is Failed to Associate, go to Step 9.

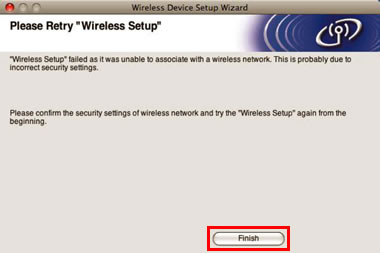
-
Click Finish. Wireless setup was unable to associate with a wireless network. This is probably due to incorrect security settings. Reset the print server back to its factory default settings. Confirm the security setting of your wireless network collected in STEP I and try starting from Step 4 again.
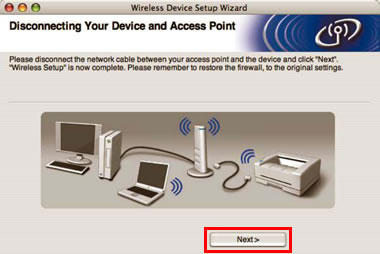
-
Disconnect the network cable between your access point (hub or router) and the printer, and click Next.
-
The driver installation starts. Follow the on-screen instructions to install the printer driver for network connection. Even if you have printed with USB connection, you need to install the printer driver for network connection.
If the printer driver for network connection has already been installed, click Cancel to finish.- DO NOT try to cancel any of the screens during this installation.
- If your wireless settings fail, an error message will appear during the installation of the printer driver and the installation will be terminated. If you encounter this failure, go back to Step 4 and setup the wireless connection again.
- If there are any programs running, close them.
- Before installation, if you are using personal firewall software, disable it. After the installation, restart your personal firewall software.
Content Feedback
Please note this form is used for feedback only.