SB1000T
FAQs & Troubleshooting |
SB1000T
Date: 05/07/2015 ID: faqh00000095_005
How do I clean the machine? (Cleaning the race)
Sewing performance will suffer if dust collects in the bobbin case; therefore, it should be cleaned periodically.
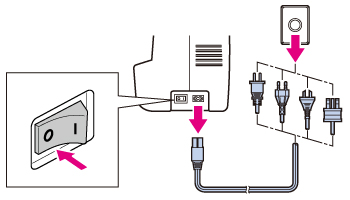
Make sure you unplug the machine before you clean it.
Otherwise, you may get an electric shock or be injured.
-
Turn off the machine, and then unplug the power cord from the power supply jack on the right side of the machine.
-
Remove the needle.
Refer to How do I change the needle?
-
Remove the presser foot and presser foot holder.
Refer to How do I remove or attach the presser foot? and How do I remove the presser foot holder?
-
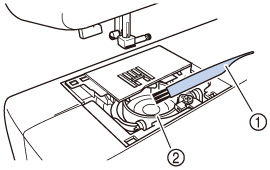
Slide the needle plate cover release toward you to remove the needle plate cover.
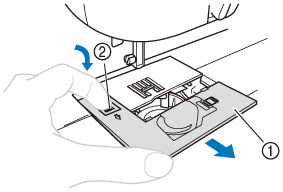
(1) Needle plate cover
(2) Needle plate cover release -
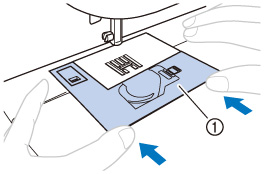
Remove the bobbin case.
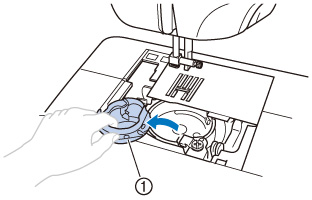
(1) Bobbin case * Grasp the bobbin case, and then pull it out.
-
Use the cleaning brush or a vacuum cleaner to remove any dust from the race and its surrounding area.
(1) Cleaning brush
(2) RaceDo not put oil on the bobbin case.
-
Insert the bobbin case so that the
 mark on the bobbin case aligns with the
  mark on the race.
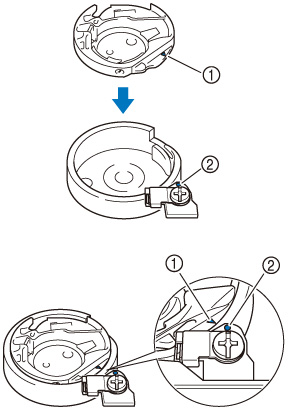
(1)
 mark
mark(2)
 mark
mark(3) Bobbin case
* Align the  and
and  marks.
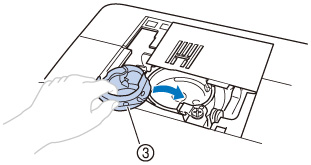
Make sure that the indicated points are aligned before installing the bobbin case.
-
Never use a bobbin case that is scratched, otherwise the upper thread may become tangled, the needle may break or sewing performance may suffer.
For a new bobbin case (part code: XE7560-001), contact your nearest authorized service center. - Make sure that you fit the bobbin case properly, otherwise the needle may break.
-
Never use a bobbin case that is scratched, otherwise the upper thread may become tangled, the needle may break or sewing performance may suffer.
-
As shown, insert the tab on the needle plate cover into the hole in the needle plate, and then correctly position of the needle plate cover.
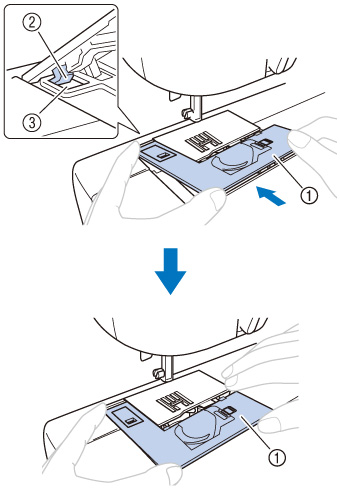
(1) Needle plate cover
(2) Tab(3) Hole
Check that the needle plate cover is flush with the top surface of the machine.
-
From the front, slide the needle plate cover back into position.
(1) Needle plate cover
If the needle plate cover is not flush with the surface of the machine as shown below, remove the needle plate cover (step 4), and then install it again (steps 8 and 9).
Sewing while the needle plate cover is not flush with the surface of the machine may cause the needle plate cover to come off of the machine, resulting in injuries if your fingers touch the race.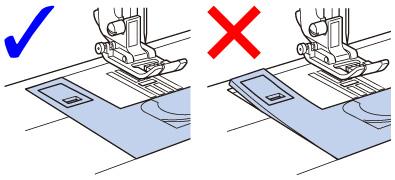
-
Install the presser foot holder and presser foot.
- Install the needle.
Related FAQs
CE1008, CE1100PRW, CE1125PRW, CE4400, CE-5500/CE-5500PRW, CE7070PRW, CE8080/CE8080PRW, CE8100, CP-6500, CP-7500, CS5055PRW, CS7130, CS7205, CS8800PRW, DZ2400, DZ2750, DZ3000, DZ3400, HC1850, HS-2500, PS300T, SB1000T, SC3000, SC6600, SC707, SC9500, SM8270, SQ9185, SQ9285, SQ9310, XR1300, XR1355, XR3140, XR3240, XR3340, XR4040, XR6060, XR9550/XR9550PRW, XS2070, XS2080, XS2100, XS3109
If you need further assistance, please contact Brother customer service:
Content Feedback
Please note this form is used for feedback only.