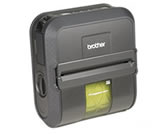
RJ-4030Ai
FAQs & Troubleshooting |

RJ-4030Ai
Date: 11/26/2020 ID: faqp00001461_008
How do I connect RJ printer to my computer?
The printer can be connected to your computer via USB cable, Bluetooth® (RJ-4030 / RJ-4030Ai only), Wi-Fi® (RJ-4040 only) and the serial cable.
Install the printer driver before connecting the printer to the computer.
> Bluetooth (RJ-4030 / RJ-4030Ai only)
[ USB Connection ]
-
Make sure that the printer is turned off before connecting the USB cable.
-
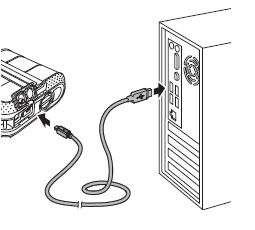
Connect the printer end of the USB cable to the USB port on the side of the printer.
-
Connect the other end of the USB cable to the USB port on the computer.

[ Bluetooth Connection (RJ-4030 / RJ-4030Ai Only) ]
Use this procedure to pair the printer with the computer using the Bluetooth management software.
-
Press and hold the
 (Power) button to turn the printer on and then press and hold the Bluetooth button.
-
Use your Bluetooth management software to discover the printer and configure the printer connection.
If the software prompts you to enter a Bluetooth passkey (PIN code), enter the passkey assigned to the printer. The printer's passkey is the last four digits of its serial number by default.
-
Write down the name of the port used for the connection.
-
Open the printer properties so that the printer’s port settings can be changed.
(To learn how to open the printer properties, see “How to open the Devices and Printers window.” )
-
Right-click the printer icon, and then click [Printer Properties] or [Properties].
-
Click the [Ports] tab
-
Select the port name confirmed in step 3 (“COM” plus a number).
-
Click [OK] to close the properties dialog box.
- Close the printers window to finish.
Refer to your Bluetooth management software’s documentation for details on connection settings, confirming the port name, etc.
Using Bluetooth to communicate when printing
-
Press and hold the
 (Power) button to turn the printer on, and then press the Bluetooth button.
-
Use your Bluetooth management software to discover the printer.
Bluetooth communication starts.
[ Wi-Fi Connection (RJ-4040 only) ]
- In order for the printer and your network access point or router to communicate, you must first install the printer driver and the Printer Setting Tool.
- You can change the printer's network settings using the Network Setting Tool (see Network Setting Tool (RJ-4040 only).
- The Network Setting Tool also allows you to easily apply the network setting changes to multiple printers.
-
Press and hold the
 (Power) button to turn the printer on, and then press the Wi-Fi button.
Wi-Fi communication starts.
-
Make sure that the printer and the computer are turned off before connecting the serial cable.
-
Connect the printer end of the serial cable to the serial port on the side of the printer.
- Connect the other end of the serial cable to the serial port on the computer.
RJ-4030, RJ-4030Ai, RJ-4040
If you need further assistance, please contact Brother customer service:
Content Feedback
Please note this form is used for feedback only.