Innov-is NV180K
FAQs & Troubleshooting |
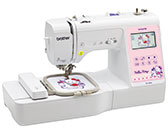
Innov-is NV180K
Date: 11/05/2018 ID: faqh00101044_000
How to make adjustments to character or decorative stitch patterns
Your stitch pattern may sometimes turn out poorly, depending on the type or thickness of fabric, the stabilizer material used, sewing speed, etc. If your sewing does not turn out well, sew trial stitches using the same conditions as the real sewing, and adjust the stitch pattern as explained below.
The basic steps to make adjustments to character or decorative stitch patterns are as follows.
-
Sew the specified pattern for adjustment.
-
Check the sewn pattern.
-
Make necessary adjustments on the settings screen according to the sewing result.
- Sew the specified pattern again to confirm the sewing result after adjustments.
1. Sewing the specified pattern for adjustment
Sew the specified pattern for adjustment using a piece of fabric, thread and needle that are the same conditions as your real sewing.
-
Attach monogramming foot "N".
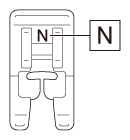
Be sure to use monogramming foot "N". Adjustments may not be made correctly with any other presser foot.
-
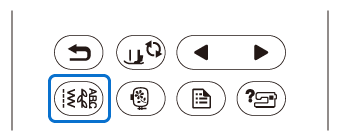
Press
 (Utility stitch key) on the operation panel.
-
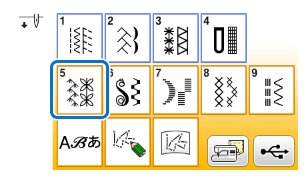
Press
 (Decorative stitches key) on the LCD.
-
Press
 (Previous page key) on the operation panel.
-
Select the pattern
 (5-31).

-
Set the fabric and begin sewing.
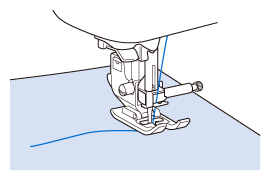
Guide the fabric with your hand to keep the fabric feeding straight and even during sewing.
If the fabric is pulled or pushed during sewing, the pattern may not turn out correctly. In such a case, adjustments may not be made correctly
> The machine stops automatically when sewing is finished.
- When sewing is finished, cut the threads, raise the presser foot lever and remove the fabric.
2. Checking the sewn pattern
Check the sewn pattern with the way that is shown below.
-
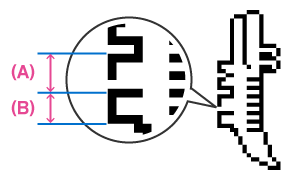
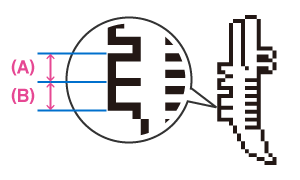
If the pattern is sewn correctly, the lengths of part (A) and part (B) of the pattern are uniformly as shown in the illustration below.
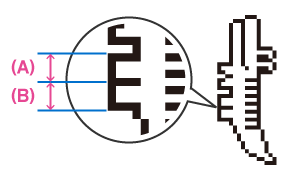
If the pattern is not sewn correctly, make the necessary adjustments according to the following procedure.
3. Making necessary adjustments on the settings screen according to the sewing result
Make adjustments to character or decorative stitch patterns with the "Fine Adjust Verti." on page 1 of the settings screen.
Opening the settings screen for adjustment
-
Press
 (Settings key) on the operation panel.
> The settings screen appears.
The "Fine Adjust Verti." is on page 1 of the settings screen.
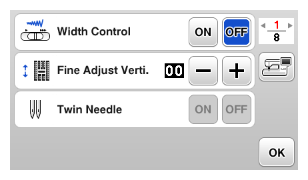
Making the fine adjustmentn
The part (A) is shorter than the part (B). [The stitch pattern is bunched:]

-
If the part (A) of the sewn pattern is shorter than the part (B), press
![key [+] key [+]](/g/b/img/faqend/faqh00101044_000/th/en/1863609/value_increase_key.gif) (Plus key) of the "Fine Adjust Verti."
(Plus key) of the "Fine Adjust Verti."
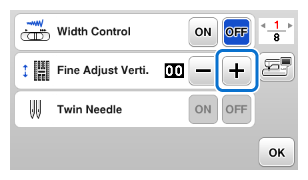
> The value in the display gets bigger.
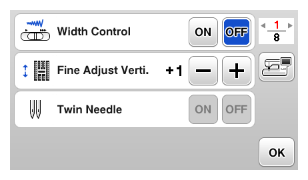
The displayed value increases each time the button is pressed and the stitch pattern will lengthen.
The part (A) is longer than the part (B) [The stitch pattern has gaps:]
-
If the part (A) of the sewn pattern is longer than part (B), press
![key [-] key [-]](/g/b/img/faqend/faqh00101044_000/th/en/1863610/value_decrease_key.gif) (Minus key) of the "Fine Adjust Verti."
(Minus key) of the "Fine Adjust Verti."
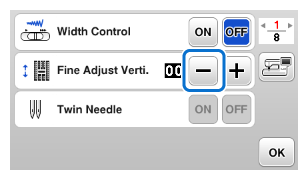
> The value in the display gets smaller.
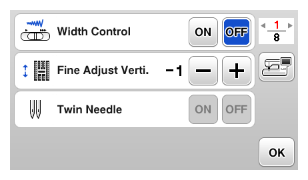
The displayed value decreases each time the button is pressed and the stitch pattern will shorten.
After changing the settings, press "OK" key to return to the previous screen.
4. Sewing the specified pattern again to confirm the sewing result after adjustments
-
Sew the pattern of adjustment again to check if it is correctly sewn.
If the pattern is sewn correctly, the lengths of part (A) and part (B) of the pattern are uniformly, the adjustment is finished.
-
If the lengths of part (A) and part (B) of the pattern are not uniformly, make the adjustment of the "Fine Adjust Verti" again.
► Refer to "3. Making necessary adjustments on the settings screen according to the sewing result".
After changing the settings of "Fine Adjust Verti.", sewing the specified pattern and check the sewn pattern.
Continue adjustment and confirmation until the pattern is sewn correctly.
-
If the stitch pattern does not turn out well even after making adjustments based on the stitch pattern described above, make adjustments for each stitch pattern individually.
-
This adjustment can be made to the following stitches and stitch patterns from the Character/Decorative Stitch categories.
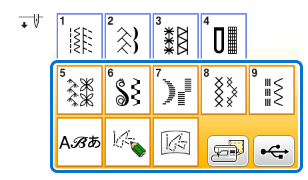
Utility stitches 

[1-30] Quilting stippling stitch
[4-15] Eyelet stitchDecorative stitches 
[5] Decorative stitches 
[6] Decorative satin stitches 
[7] Satin stitches 
[8] Cross stitch stitches 
[9] Utility decorative stitches Character stitches 
Character stitches (Gothic font/Handwriting font/Outline/Japanese font) MY CUSTOM STITCH 
MY CUSTOM STITCH stored in the machine's memory or USB flash drive Stitch patterns stored in memories 
Stitch patterns stored in the machine's memory, Stitch patterns stored in USB flash drive
Innov-is NV180, Innov-is NV180D, Innov-is NV180K
If you need further assistance, please contact Brother customer service:
Content Feedback
Please note this form is used for feedback only.
Please do not enter contact information or any other personal information here.
(We will not respond to any Feedback you send us.)