Innov-is 50
FAQs & Troubleshooting |
Innov-is 50
Date: 30/07/2014 ID: faqh00100038_000
Replacing the presser foot
- Use the presser foot appropriate for the type of stitch that you wish to sew, otherwise the needle may hit the presser foot, causing the needle to bend or break.
- Only use presser feet designed specifically for this sewing machine. Use of any other presser foot may result in injuries or damage to the machine.
-
Press
 (needle position button) once or twice to raise the needle.
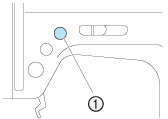
(1) Needle position button -
Turn off the sewing machine.

Before replacing the presser foot, be sure to turn off the sewing machine, otherwise injuries may occur if
 (start/stop button) is accidentally pressed and the machine starts sewing.
-
Raise the presser foot lever.
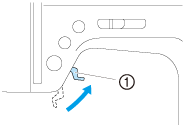
(1) Presser foot lever
-
Press the black button at the back of the presser foot holder.

(1) Black button (2) Presser foot holder
-
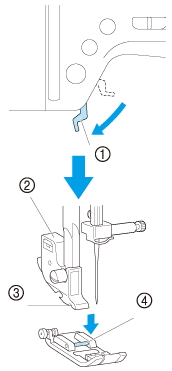
Place a different presser foot below the holder so that the presser foot pin is aligned with the notch in the holder.
Position the presser foot so the letter indicating the presser foot type (A, G, I, J, M, N or R) is positioned to be read.
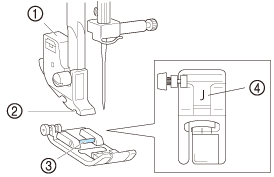
(1) Presser foot holder (2) Notch
(3) Pin
(4) Presser foot type
-
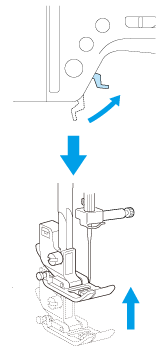
Slowly lower the presser foot lever so that the presser foot pin snaps into the notch in the presser foot holder.
(1) Presser foot lever (2) Presser foot holder
(3) Notch
(4) Pin
-
Raise the presser foot lever to check that the presser foot is securely attached.
Innov-is 50, Innov-is 55P
If you need further assistance, please contact Brother customer service:
Content Feedback
To help us improve our support, please provide your feedback below.
Step 1: How does the information on this page help you?
Step 2: Are there any comments you would like to add?
Please note this form is used for feedback only.
Please do not enter contact information or any other personal information here.
(We will not respond to any Feedback you send us.)