FS60X
FAQs & Troubleshooting |
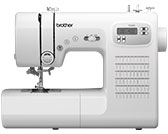
FS60X
Date: 27/08/2020 ID: faqh00000467_021
How do I thread my machine? (For models equipped with the needle threader)
- When threading the upper thread, make sure that you thread the machine properly. If the upper threading is not correct, the thread could tangle and the needle may bend or break.
- Never use a thread weight of 20 or lower.
- Use the needle and the thread in the correct combination. For details on the correct combination of needles and threads, refer to "Combination of fabric, thread and needle".

[1] Preparing for threading
-
Raise the presser foot lever to raise the presser foot.

-
Turn on the machine.

-
Press
 (Needle position button) once or twice to raise the needle.

-
Turn off the machine.

Before threading the needle, be sure to turn off the machine, otherwise injuries may occur if the Start/Stop button or any other button is pressed, causing the machine to start operating.
[2] Threading the upper thread
-
Pull up the spool pin as far as possible, and then put a spool of thread on this pin.

* Make sure that the thread unwinds as shown. -
While holding the thread from the spool with your right hand, pass the thread toward you, in the groove on the thread guide.

(1) Thread guide (2) Spring * Make sure that the spring in the groove catches the thread.
-
Feed the upper thread as shown in the following illustration.

(1) Thread take-up lever
* Make sure you guide the thread through the thread take-up lever from right to left as shown in the following illustration.
-
Slide the thread behind the needle bar thread guide.

(1) Needle bar thread guide
[3] Threading the needle
- The needle threader can only be used with home sewing machine needles size 75/11- 100/16. If you are using transparent nylon monofilament thread, you can only use needles in the range of 90/14-100/16.
- You cannot use the needle threader if you are using decorative threads or special needles, such as the twin needle and wing needle. If you are using those types of threads or needles, thread the eye of the needle by hand. For details, refer to "Threading the needle manually (without using the needle threader)".
- Make sure the main power switch is off when threading the needle.
-
Lower the presser foot lever.

-
While lowering the needle threader lever fully
 , hook the thread onto the guide
  .
.

-
Push back the needle threader lever until it stops
 , and pass the thread in front of the needle. Make sure that the thread is under the hook that has come through the eye of the needle and the hook catches the thread
  .
.

-
Return the needle threader lever to the front slowly
 , and then release the lever slowly.

-
Carefully pull the loop of the thread through the eye of the needle to pull out the end of the thread.

-
Raise the presser foot lever.

-
Pass the end of the thread through and under the presser foot, and then pull out about 10 cm (approx. 4 inches) of thread toward the rear of the machine.

(1) 10 cm (4 inches)
Threading the needle manually (without using the needle threader)
When using specialty thread, such as transparent nylon thread, a wing needle or a twin needle which cannot be used with the needle threader, thread the needle as described below.
Make sure the main power switch is off when threading the needle.
-
Thread the machine to the needle bar thread guide.
For details, refer to "[1] Preparing for threading" and "[2] Threading the upper thread".
-
Insert the thread through the eye of the needle from front to back.

-
Pass the end of the thread through and under the presser foot, and then pull out about 10 cm (approx. 4 inches) of thread toward the rear of the machine.

(1) 10 cm (4 inches)
Content Feedback
Please note this form is used for feedback only.
Please do not enter contact information or any other personal information here.
(We will not respond to any Feedback you send us.)