MFC-295CN
FAQs & Troubleshooting |

MFC-295CN
Date: 10/22/2020 ID: faq00100180_005
Install PaperPort™ 12SE / 14SE onto Windows 10.
You can install PaperPort™ 12SE / 14SE from the CD-ROM supplied with your Brother machine.
Check the OS written on the CD-ROM label and follow the steps applicable for your case.
- If you find Windows 10 on your CD-ROM label, go to Case A: Windows 10 is written on the CD-ROM label.
- If do not, go to Case B: Windows 10 is NOT written on the CD-ROM label.
Case A: Windows 10 is written on the CD-ROM label.
- Insert the CD-ROM supplied with your Brother machine into the CD/ DVD drive.
-
Click File Explorer.

- Open the CD/ DVD drive and then double-click the start.exe to run the opening screen.
-
Choose your model (if needed) and language and then click Install MFL-Pro suite. Follow the onscreen instructions to install PaperPort™ 12SE / 14SE.
- If the User Account Control screen appears during installation, click Yes.
-
If the Scan button is grayed out when you open the PaperPort™ 12SE / 14SE application after installation, you need to get a patch software to fix it.
Follow the steps below to download and run the patch software:
- Close PaperPort™ 12SE / 14SE.
- > Click here to download the Scanner Connection Tool.(Jump to the Kofax® website. Opening new window.)
- Once the file has downloaded, double-click the "PPScnConnTool.exe" file.
- When the PaperPort Scanner Connection Tool appears, click the "Enable" button.
- Launch PaperPort™ 12SE / 14SE and confirm the "Scan" button is now accessible.
Case B: Windows 10 is NOT written on the CD-ROM label.
- Insert the CD-ROM supplied with your Brother machine into the CD/ DVD drive.
-
Click File Explorer.

- Open the CD/ DVD drive.
- Open the paperport folder and then the program folder. Double-click setup.exe.
- The installation will start. Follow the installation screen directions.
Step2: Installing Microsoft Visual C++ 2005 Redistributable Package
Installation steps vary depending on the version of your Windows 10. Follow the steps below for your Windows 10 version.
[For 32bit users]
- Open the Utilities folder. Double-click vcredist_x86.exe.
-
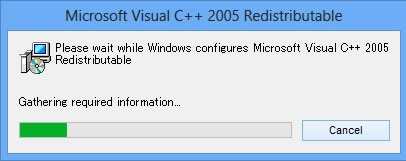
A window will appear. After finishing installation, the window will close.

[For 64bit users]
- Open the Utilities folder. Double-click vcredist_x86.exe.
-
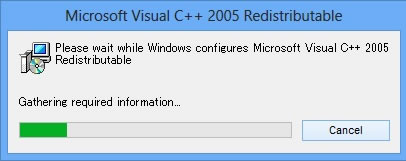
A window will appear. After finishing installation, the window will close.

- Open the System64 folder. Double-click vcredist_x64.exe.
-
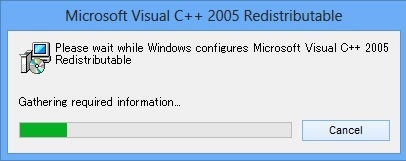
A window will appear. After finishing installation, the window will close.

Step3: Installing PaperPort Image Printer
Installation steps vary depending on the version of your Windows 10. Follow the steps below for your Windows 10 version.
[For 32bit users]
- Go back to the paperport folder. Open the printer folder, and then the sytem32 folder.
- Double-click setup.exe.
- The installation will start. Follow the installation screen directions.
[For 64bit users]
- Go back to the paperport folder. Open the printer folder, and then the system64 folder.
- Double-click setup.exe.
- The installation will start. Follow the installation screen directions.
DCP-145C, DCP-165C, DCP-185C, DCP-195C, DCP-375CW, DCP-385C, DCP-585CW, DCP-6690CW, DCP-7030, DCP-7040, DCP-8070D, DCP-9010CN, DCP-9040CN, DCP-J125, DCP-J715W, MFC-250C, MFC-255CW, MFC-290C, MFC-295CN, MFC-490CW, MFC-5490CN, MFC-5890CN, MFC-6490CW, MFC-6890CDW, MFC-7340, MFC-7450, MFC-7840N, MFC-790CW, MFC-795CW, MFC-8370DN, MFC-8380DN, MFC-8880DN, MFC-9120CN, MFC-9320CW, MFC-9440CN, MFC-9450CDN, MFC-9840CDW, MFC-990CW, MFC-J415W, MFC-J615W
If you need further assistance, please contact Brother customer service:
Content Feedback
Please note this form is used for feedback only.