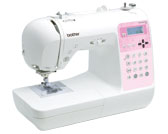
Innov-is 55P
FAQs & Troubleshooting |

Innov-is 55P
Date: 07/04/2009 ID: faqh00000436_001
How do I wind the bobbin?

 Hook of the bobbin-winding thread guide
 Pretension disk
 Bobbin winder shaft
 Bobbin
- The order that the machine should be threaded for winding the bobbin is indicated by a broken line on the sewing machine.
Be sure to thread the machine as indicated.
- Only use the bobbin designed specifically for this sewing machine.
Use of any other bobbin may result in injuries or damage to the machine.
- The included bobbin was designed specifically for this sewing machine.
If bobbins from other models are used, the machine will not operate correctly.
Use only the included bobbin or bobbins of the same type.

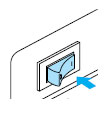
- Turn on the sewing machine.

- Place the bobbin on the bobbin winder shaft so that the spring on the shaft fits into the notch in the bobbin.
Press down on the bobbin until it snaps into place.

 Notch
Notch
 Bobbin winder shaft spring
- Slide the bobbin winder shaft to the right until it snaps into place.

- Remove the spool cap that is inserted onto the spool pin.

 Spool pin
 Spool cap
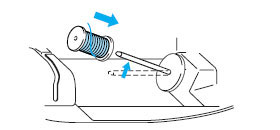
- Place the spool of thread for the bobbin onto the spool pin.
Slide the spool onto the pin so that the spool is horizontal and the thread unwinds to the front at the bottom.
If the spool is not positioned so that the thread unwinds correctly, the thread may become tangled around the spool pin.
- Slide the spool cap onto the spool pin.
Slide the spool cap as far as possible to the right, as shown, with the rounded side on the left.
- While holding the spool with your right hand, pull the thread with your left hand, and then pass the thread under the thread guide.

 Thread guide
- Pass the thread under the thread guide cover from the back to the front.
Hold the thread with your right hand so that there is no slack in the thread that is pulled out, and then pass the thread under the thread guide cover with your left hand.
 Thread guide cover
- Pull the thread to the right, pass it under the hook of the bobbin-winding thread guide, and then wind the thread counterclockwise between the discs, pulling it in as far as possible.

 Hook of the bobbin-winding thread guide
 Pretension disk
Make sure that the thread passes under the pretension disk.
- While using your left hand to hold the thread that was passed through the bobbin-winding thread guide, use your right hand to wind the end of the thread clockwise around the bobbin five or six times.

- Pass the end of the thread through the slit in the bobbin winder seat, and then pull the thread to the right to cut it.

 Slit in bobbin winder seat (with built-in cutter)
- The thread is cut to a suitable length.
Be sure to cut the thread as described.
If the bobbin is wound without cutting the thread using the cutter built into the slit in the bobbin winder seat, the bobbin may not be wound correctly. In addition, the thread may become tangled in the bobbin or the needle may bend or break when the bobbin thread starts to run out. - Slide the sewing speed controller to the right (for a faster sewing speed).

 Sewing speed controller
Press (start/stop button) once.
The bobbin starts spinning and the thread is wound around the bobbin.

 start/stop button
 - When the bobbin winding becomes slow, press
 (start/stop button) once to stop the machine.
When the bobbin winding becomes slow, stop the machine, otherwise the sewing machine may be damaged.
- Cut the thread, slide the bobbin winder shaft to the left, and then remove the bobbin from the shaft.

Slide the sewing speed controller back to its original position.
When the sewing machine is started or the handwheel is turned after winding the bobbin, the machine will make a clicking sound; this is not a malfunction.
Related FAQs
Innov-is 50, Innov-is 55P, Innov-is 980D
If you need further assistance, please contact Brother customer service:
Content Feedback
Please note this form is used for feedback only.