MFC-9140CDN
FAQs & Troubleshooting |
MFC-9140CDN
Date: 29/01/2013 ID: faq00000315_015
Replace WT (waste toner) Box
Follow the steps below to replace waste toner box.
For the order number (Order No.) of the waste toner box, click here to see the Consumables & Options page.
- Make sure that the machine is turned on.
- Open the top cover until it locks in the open position.
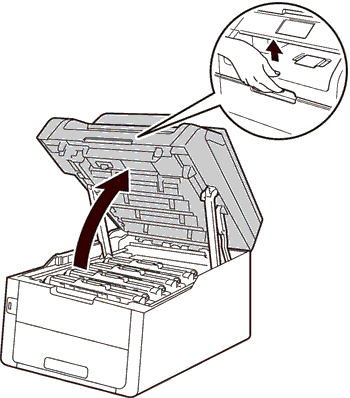
- Take out all of the toner cartridge and drum unit assemblies.
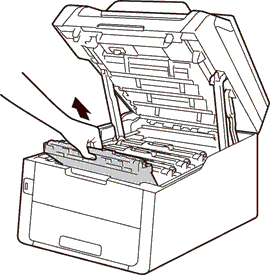
- Hold the green handle of the belt unit and lift the belt unit up, and then pull it out.
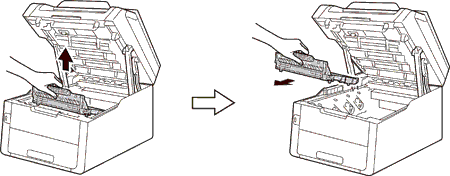
- Remove the orange packing material and discard it.
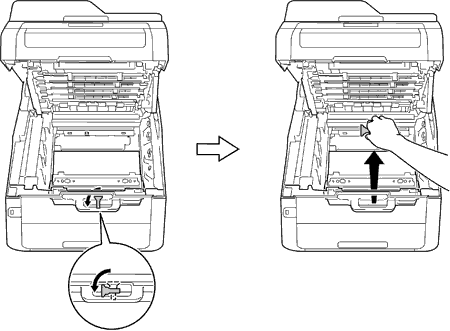
This step is only necessary when you are replacing the waste toner box for the first time, and is not required for the replacement waste toner box. The orange packing pieces are installed at the factory to protect your machine during shipment.
- Hold the green handle of the waste toner box and remove the waste toner box from the machine.
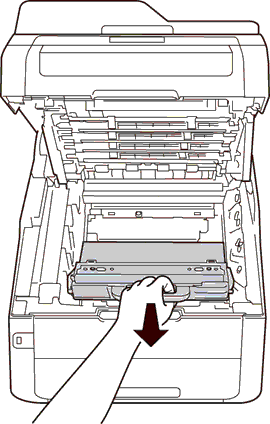
- Unpack the new waste toner box and install the new waste toner box in the machine.
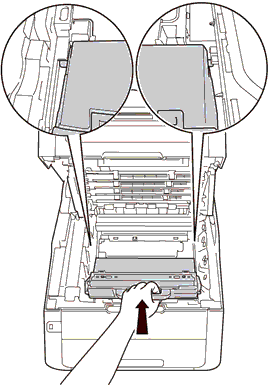
- Put the belt unit back in the machine.
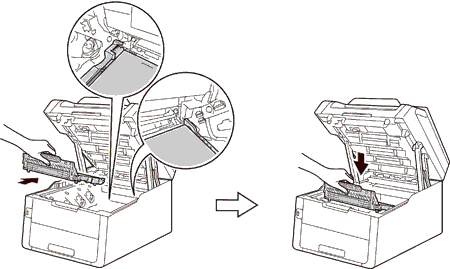
- Slide each toner cartridge and drum unit assembly into the machine. Make sure that you match the toner cartridge color to the same color label on the machine. Repeat this step for all the toner cartridge and drum unit assemblies.
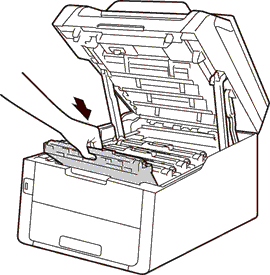
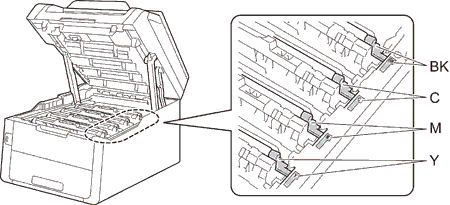
- Close the top cover of the machine.
MFC-9140CDN, MFC-9340CDW
If you need further assistance, please contact Brother customer service:
Content Feedback
To help us improve our support, please provide your feedback below.
Step 1: How does the information on this page help you?
Step 2: Are there any comments you would like to add?
Please note this form is used for feedback only.