SDX1000
FAQs & Troubleshooting |
SDX1000
Date: 30/09/2019 ID: faqh00100488_000
How to Change the Pen Adjuster
There are two pen adjusters: A (for a 3.5 mm pen tip) and B (for a 2.0 mm pen tip).
Change the pen adjuster according to the pen to be used.
-
Push down on the release lever on the calligraphy stand.
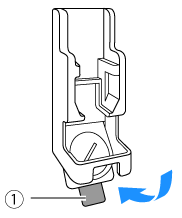
(1) Release lever
-
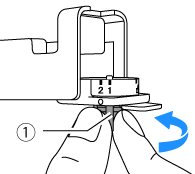
Rotate the tab on the back of the pen adjuster to align the indicator with the unlock position (
 ).
).
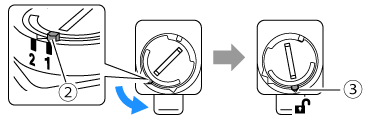
(1) Tab (2) Indicator (3) Unlock position
-
From the bottom of the tab, push up the pen adjuster (A), and then remove it from the calligraphy stand (B).
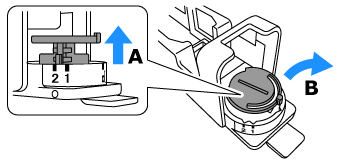
-
Install the pen adjuster into the calligraphy stand, aligning the indicator on the pen adjuster being installed with the unlock position.
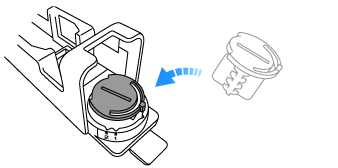
-
Rotate the tab on the pen adjuster to move the indicator away to position 1 or 2 from the unlock position.
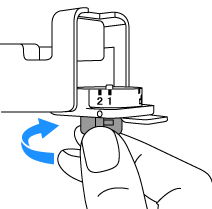
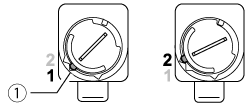
(1) Indicator
Pen adjuster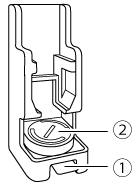
Indicator* Indicator position 1 Indicator position 2 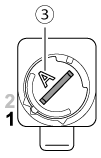
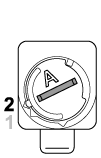
(1) Release lever (2) Pen adjuster Indicator* (3) A or B depending on the pen adjuster * Rotate the tab on the back of the pen adjuster to align the calligraphy font to be used.
For details on the Indicator, refer to About the Indicator on the Pen Adjuster.
-
Return the release lever on the calligraphy stand to its original position.

SDX1000, SDX1200, SDX1250, SDX2250D
If you need further assistance, please contact Brother customer service:
Content Feedback
Please note this form is used for feedback only.
Please do not enter contact information or any other personal information here.
(We will not respond to any Feedback you send us.)