Innov-is 950
FAQs & Troubleshooting |
Innov-is 950
Date: 27/09/2010 ID: faqh00000581_000
How do I retrieve a specific embroidery pattern from the computer to the machine via a USB media?
Embroidery patterns can be transferred from a computer to the machine by using a USB media.
Follow the procedure below.
Prepare embroidery data on the computer by observing the precautions of "Embroidery data precautions".
Be sure to read the all precautions of "Embroidery data precautions" and observe them. Otherwise, the pattern files may not be retrieved into the machine correctly.
-
Insert the USB media into the USB port on the computer.
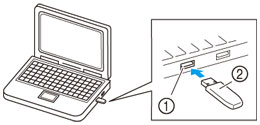
 USB port on the computer
 USB media
 -
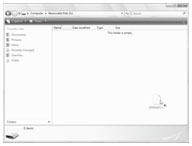
The “Removable Disk” icon appears in “Computer (My computer)” on the computer.

-
Copy the embroidery data (folders and/or pattern files).
-
Safely remove the USB media from the USB port on the computer.
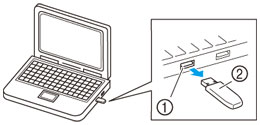
 USB port on the computer
 USB media
 -
Insert the USB media into the USB port on the machine.

 USB port (for a USB flash drive [USB flash memory])
 USB media
 -
Press
 (USB key).
![Press [USB key].](/g/b/img/faqend/faqh00000581_000/nz/en/23883/cuh_rtusb095.jpg)
-
Folders and/or pattern files in the root directory of the USB media are displayed.
- Names of folders are displayed first in the shape of
 in the alphabetical order, then .pes files and then .dst files are displayed in the shape of
  in the alphabetical order.
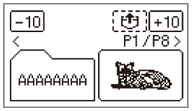
- .pes files are displayed in thumbnail-size image, and .dst files are displayed by its name, file format and file size.
If the message “Reduce the number of patterns.” appears, the USB media may contain either more than 200 patterns (including folders) or the embroidery designs may contain too many colors (although there may be no more than 200 patterns).
In this case, unplug the USB media from the machine, plug it back into the computer, and then delete a few patterns at a time from the USB media.
Close the error message on the machine, and then repeat procedures starting from step 5. - Names of folders are displayed first in the shape of
-
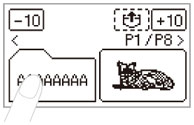
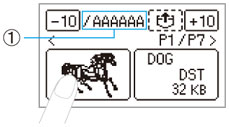
Select the desired folder or the pattern you wish to retrieve.
Switch screens using (Previous page key) and
  (Next page key).
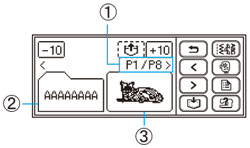
 Number of the currently displayed page from the total number of pages
 Folder (folder name)
 Pattern file (thumbnail-size image or file name)
When
![[-10] key](/g/b/img/faqend/faqh00000581_000/nz/en/23895/cuh_bwd10_key1.jpg) /
/ ![[+10] key](/g/b/img/faqend/faqh00000581_000/nz/en/23896/cuh_fwd10_key1.jpg) is pressed, the display of folders and/or patterns moves forward or backward in increments of 10.
is pressed, the display of folders and/or patterns moves forward or backward in increments of 10.-
When you have selected a folder
Pattern files in the folder are displayed. Go to step 9.
-
When you have selected a pattern
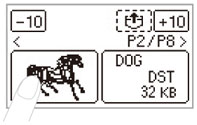
The pattern is shown in reverse highlighting.
Skip to step 10.
-
-
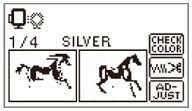
Select the pattern you wish to retrieve.
 Folder name (Displayed in up to 6 characters only when a folder is selected.)
To return to the root directory, press
 (Return key).
-
Press
 (Retrieve key).
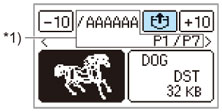
*1) The display of this part differs depending on the operation in step 8.
-
The saved pattern is retrieved.
The embroidery screen appears, and you can embroider the retrieved pattern. -
Adjust the pattern as desired, and then begin embroidering.
|
Observe the following precautions when using embroidery data other than that created and saved in this machine.
When using embroidery data other than our original patterns, the thread or needle may break when sewing with a stitch density that is too fine or when sewing three or more overlapping stitches. In that case, use one of our embroidery software programs to edit the embroidery data.
|
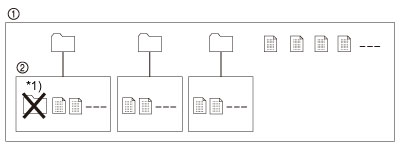
 Root directory of the USB media
 Sub-directory
 : Folder
 : Embroidery data file
 (Retrieve key) to display the design on the screen.
Innov-is 950
If you need further assistance, please contact Brother customer service:
Content Feedback
Please note this form is used for feedback only.