Innov-is 500D
FAQs & Troubleshooting |

Innov-is 500D
Date: 31/03/2016 ID: faqh00000015_000
How do I wind the bobbin?
Wind the thread around the bobbin to prepare the bobbin thread.
-
Turn on the sewing machine.
Open the bobbin winder cover at the top of the right side of the sewing machine.
Raise until it stops with a click.
 Raise until it stops with a click.
 -
Swing up the bobbin thread spool pin.
Move the bobbin thread spool pin up as far as possible.
 Bobbin thread spool pin
 -
Place the bobbin on the bobbin winder shaft so that the spring on the shaft fits into the notch in the bobbin.

 Notch
Notch
 Bobbin winder shaft spring
 -
Slide the bobbin winder shaft to the right.

-
Place the spool of thread for the bobbin onto the bobbin thread spool pin.

Use the special Brother embroidery bobbin thread when embroidering.
-
Slide the spool cap onto the bobbin thread spool pin.
With the rounded side of the spool cap positioned toward the left, slide the spool cap onto the bobbin thread spool pin as far as possible until the right side of the spool touches the right end of the bobbin thread spool pin.

-
Pull out some thread, and then thread the thread guide for bobbin winding.
Be sure that the thread is fully in the two thread guides for bobbin winding.
 Thread guide for bobbin winding
 Two slits
 Pretension disk
Make sure that the thread passes under the pretension disk.
-
Wind the thread that was pulled out onto the bobbin.
Wind the thread that was pulled clockwise five or six times without any slack.

Be sure to pull the thread tightly and wind it clockwise. If the thread is wound counterclockwise, the thread may wind around the bobbin winder shaft.
-
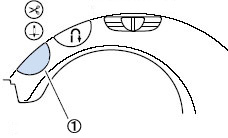
Pass the end of the thread through the guide slit in the bobbin winder seat, and then pull the thread to the right to cut it.

 Guide slit in bobbin winder seat
(with built-in cutter)- Be sure to cut the thread as described. If the bobbin is wound without cutting the thread using the cutter built into the slit in the bobbin winder seat, the thread may become tangled in the bobbin or the needle may bend or break when the bobbin thread starts to run out.
-
Make sure that the thread is correctly set before starting the bobbin winding.
Otherwise the thread may become tangled and fail to wind the thread.
-
Slide the sewing speed controller to the right (so that the speed will be fast).

 Sewing speed controller
 -
Press the Start/stop button once.
When the foot controller is plugged in, press down on the foot controller.
 Start/stop button
Do not get away from the machine while winding the bobbin. Make sure that the bobbin thread is being winded correctly. If the bobbin thread is winded incorrectly, press the Start/stop button or operate the foot controller immediately to stop the bobbin winding.
-
When the bobbin winding stops or becomes slow, press the Start/stop button once to stop the machine.
When the foot controller is plugged in, remove your foot from the foot controller.
The bobbin winding will stop.When the bobbin winding stops or becomes slow, stop the machine.
Otherwise, the sewing machine may be damaged. -
Cut the thread with scissors, slide the bobbin winder shaft to the left, and then remove the bobbin from the shaft.

If the bobbin winder shaft is set to the right side, the needle will not move. (Sewing is impossible.)
- Slide the sewing speed controller back to its original position.
Related FAQs
CS-8060, Innov-is 500D
If you need further assistance, please contact Brother customer service:
Content Feedback
Please note this form is used for feedback only.