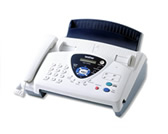
FAX-737MC
FAQs & Troubleshooting |

FAX-737MC
Date: 24/08/2006 ID: faq00000545_000
How do I replace the ribbon?
Replace the ribbon by following the instructions below:
-
Open the top cover by lifting the lever on the right side of the top cover.
Be careful not to cut yourself on the sharp edges of the metal part shown in the illustration.

-
Remove the print cartridge containing the used ribbon and set it upside–down with the blue gear in the upper left corner.

-
Take the used ribbon out of the cartridge:
Snap out the upper white spool and slide the roll off the blue gear and lift out the lower roll.
Do not remove the blue gear.

-
Slide the white elastic off the new refill rolls and set them down with the full roll in the lower position. (The ribbon's shiny side is facing down.)
-
Remove the white gear and spools from the ends of the used cardboard cores. Then insert them into the same positions in the new cores.

-
Install the new ribbon in the cartridge. Insert the lower roll into the cartridge holders and slip the upper left cardboard core onto the blue gear of the cartridge, then insert the upper roll into the cartridge holders.

-
Turn the upper right white spool clockwise to tighten the ribbon, as shown.

-
Turn the cartridge over and re-install it in your machine.

-
Press down on both sides of the top cover to close it securely.
FAX-727, FAX-737MC
If you need further assistance, please contact Brother customer service:
Content Feedback
To help us improve our support, please provide your feedback below.
Step 1: How does the information on this page help you?
Step 2: Are there any comments you would like to add?
Please note this form is used for feedback only.