PT-9500PC
FAQs & Troubleshooting |
PT-9500PC
Date: 22/10/2020 ID: faqp00001523_000
How can I print data directly from Access 2010?
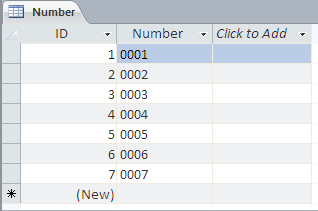
In this FAQ, we take a database created in Access 2010 as an example, and introduce how to print the data in the field "Number" on to a 36mm tape using the PT-9800PCN, while specifying the label size of 12 mm x 36 mm and the printing size of 10 mm x 26 mm.
-
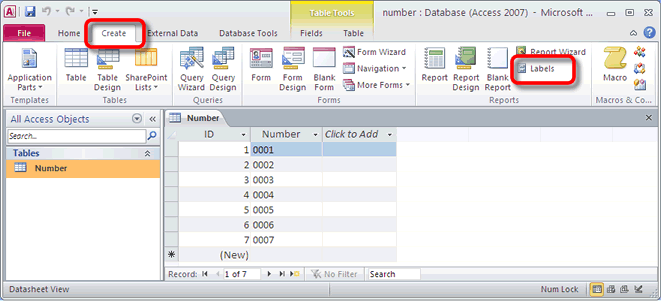
Click the [Create] tab and click the [Labels] button to open the "Label Wizard" dialog box.
-
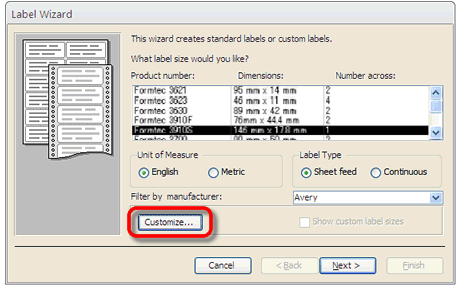
In the "Label Wizard" dialog box, click the [Customize…] button. Here you can create a custom label specifying the label type and the printing size.
-
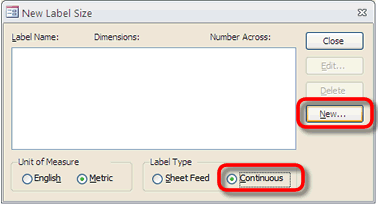
The "New Label Size Wizard" dialog box appears. In the "New Label Size" dialog box, select the "Continuous" radio button in the "Label Type" field, and then click the [New...] button to open the "Edit Label" dialog box.
-
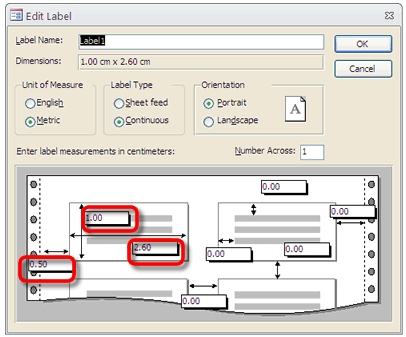
In the "Edit Label" dialog box, enter the print size, and then click the [OK] button.
(e.g. Height: 1.00 cm; Width: 2.60 cm; Side Margin: 0.50 cm)
-
In the "New Label Size" dialog box, click the [Close] button.
-
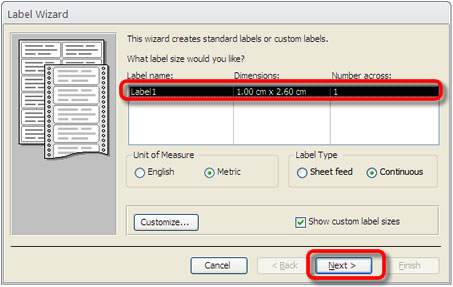
In the "Label Wizard" dialog box, make sure that the label you defined in step 4 is selected in the label type list, and then click the [Next] button.
-
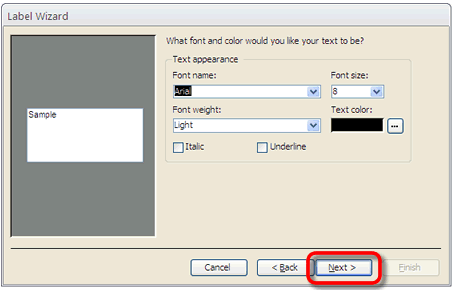
You can change the text appearance if necessary and then click the [Next] button.
-
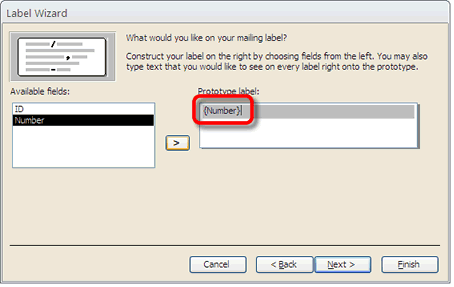
Add the {Number} in the Prototype label field and click the [Next] button.
-
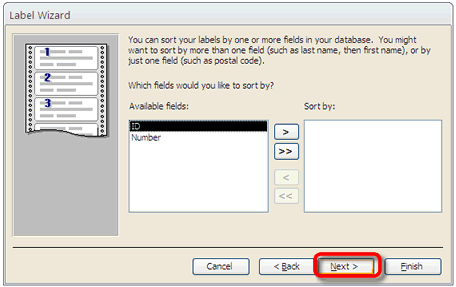
Click the [Next] button.
-
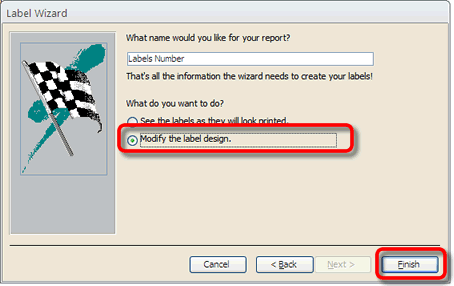
Select "Modify the label design" and click the [Finish] button.
-
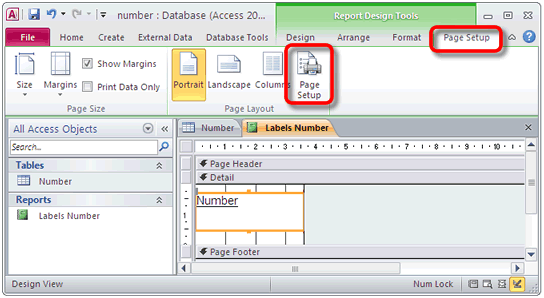
The label report (here named as "Labels Number") is created. If you prefer you can change the layout design and then open the "Page Setup" ribbon by clicking the [Page Setup] tab. Click the [Page Setup] button.
-
In the "Page Setup" dialog box, click the [Page] tab and select "Use Specific Printer", and then click the [Printer...] button.

-
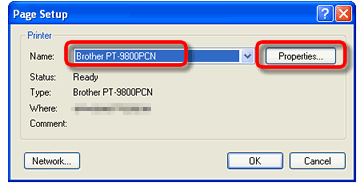
In the "Page Setup" dialog box, select your printer model and click the [Properties] button. (e.g. "Brother PT-9800PCN")
-
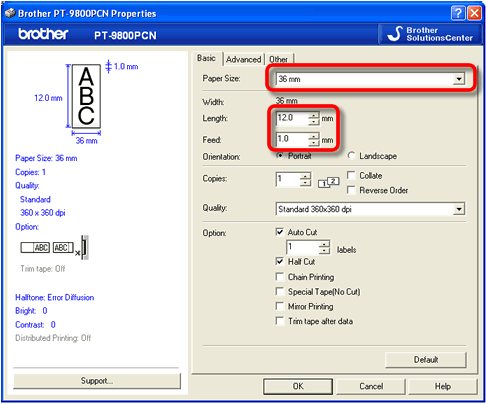
In the Brother Printer Properties dialog box, select your tape width in the "Paper Size" list and specify the label length and feed size. Then, click the [OK] button.
(e.g. Tape Width: [36 mm]; Length: 12.0 mm; Feed: 1.0 mm)
-
Click the [OK] button in the "Page Setup" dialog box.
-
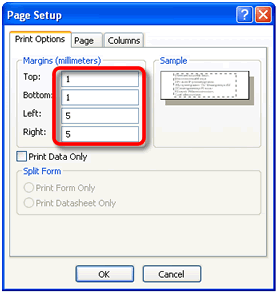
Click the [Print Options] tab in the "Page Setup" dialog box and specify the appropriate margins between the label size you specified in step 14 and the print size you specified in step 4.
(e.g. Top Margin: 1 mm; Bottom Margin: 1 mm; Left Margin: 5 mm; Right Margin: 5 mm)
Then click the [OK] button.
-
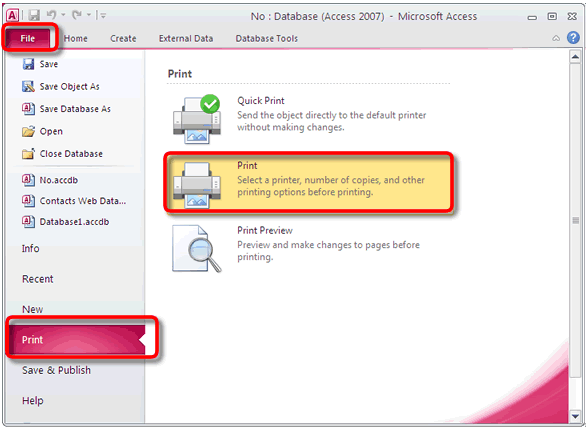
Click the "File" tab, then click the "Print" tab. Click [Print] to open the "Print" dialog box.
-
Enter the "Print Range" if necessary and click the [OK] button.
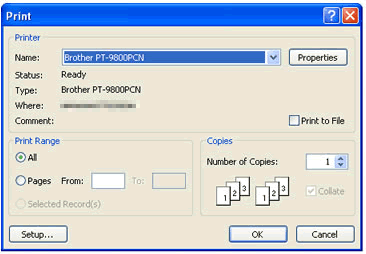
- The label will start to print.
Related FAQs
PT-2430PC, PT-9500PC, PT-9700PC, QL-700, QL-720NW, QL-800, QL-810W, QL-820NWB
If you need further assistance, please contact Brother customer service:
Content Feedback
To help us improve our support, please provide your feedback below.
Step 1: How does the information on this page help you?
Step 2: Are there any comments you would like to add?
Please note this form is used for feedback only.
