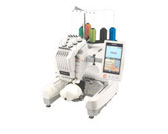
PR-650/650C
FAQs & Troubleshooting |

PR-650/650C
Date: 09/06/2016 ID: faqh00000598_000
Maintenance (Cleaning the thread paths of the upper threads)
If dust or lint has accumulated in the thread guides or tension unit in the paths of the upper threads, the thread may break while embroidery is being sewn. Periodically clean the thread paths.
Cleaning the thread guides
-
Use the included cleaning brush to remove any lint and dust from below the thread guide plates.
Clean the thread guide plates for both the upper thread guides and the middle thread guides.


Upper thread guide 
Middle thread guide 
Thread guide plate
Disassembling and cleaning the tension unit
-
To remove tension dial, turn dial counterclockwise as shown on illustration.


Tension dial -
Using the included cleaning brush, remove any lint and dust from the two pieces of felt washers (top, bottom) inside the tension dial.


Tension dial 
Nylon shoulder washer 
Nylon washer
(only for tension number 4)
Tension spring 
Tension base spring 
Felt washer (top) 
Tension disc 
Felt washer (bottom) -
Reassembling the tension unit.
-
When reassembling the tension unit, be sure not to install the tension disc upside-down. There is a magnet on the bottom.
Bottom Top 


Magnet
-
When reassembling the tension unit, only tension number 4 has one more part than the other tension units.


Felt washer (bottom) 
Tension disc
(magnet on the bottom)
Felt washer (top) 
Tension base spring 
Tension spring 
Nylon washer
(only for tension number 4)
Nylon shoulder washer 
Tension dial
- When reassembling the tension unit, be careful not to lose any parts or install any parts in an incorrect order. The machine may not operate correctly if the tension units are incorrectly reassembled.
-
When reassembling the tension unit, be sure not to install the tension disc upside-down. There is a magnet on the bottom.
Related FAQs
PR-650/650C, PR650e/PR650eC, PR655/PR655C
If you need further assistance, please contact Brother customer service:
Content Feedback
To help us improve our support, please provide your feedback below.
Step 1: How does the information on this page help you?
Step 2: Are there any comments you would like to add?
Please note this form is used for feedback only.