PT-P950NW
FAQ 및 문제 해결 |
PT-P950NW
날짜:06/11/2020 ID:faqp00100255_000
Installing the Touch Panel Display (Optional)
Installing the Touch Panel Display
-
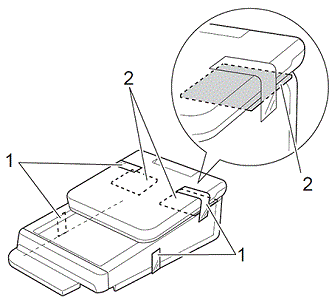
Remove the pieces of tape (1) and protective materials (2) before use.
-
Press and hold the
 (Power) button to turn the printer off, and then disconnect the printer from the electrical socket. If the rechargeable Li-ion battery (optional) is being used, remove the rechargeable battery.
-
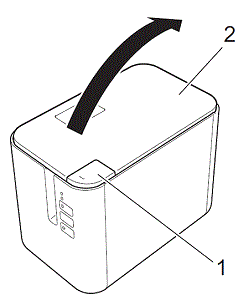
Press the cover open button (1) and lift the tape compartment cover (2) to open it.
-
While holding the tape compartment cover securely, use a screwdriver to remove the four screws (1).
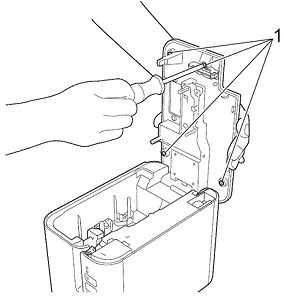
Be careful not to allow the top cover to fall when the four screws are removed.
-
Close the tape compartment cover, and then remove the top cover (1) and clear panel (2).
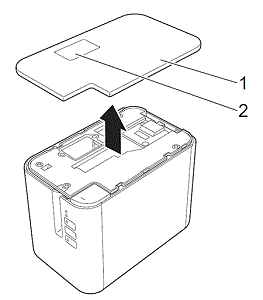
-
Plug the connector on the touch panel display into the connector on the printer. Insert the four tabs on the touch panel display into place on the printer.
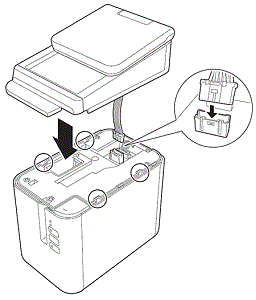
Be careful that the connector cords are not trapped by the cover. In addition, if the cords are caught between the screw holes, the cords may be damaged when the screws are tightened.
-
While holding the touch panel display securely, open the tape compartment cover. Secure the touch panel display with the four screws (1) included as accessories to attach the touch panel display to the printer.
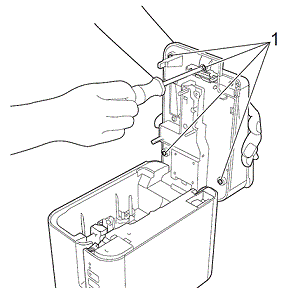
Be sure to use the screws included with the touch panel display. The screws previously installed in the printer are of a different shape.
-
Close the tape compartment cover by pressing down on the center until it locks into place.
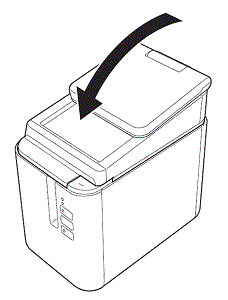
Main screen
Lift the LCD, and then adjust it to an angle so that the screens are visible. If the screens are dark and hard to read, the backlight can be turned on.
When the printer is turned on, the main screen appears.
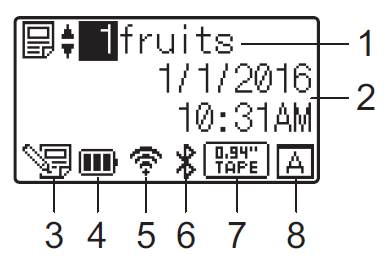
|
1 Template name and number 2 Time and date 3 Template editing indicator 4 Battery level display 5 Wireless LAN indicator
6 Bluetooth® indicator 8 Touch panel setting |