DCP-J125
FAQs & Troubleshooting |
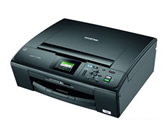
DCP-J125
Date: 16/02/2012 ID: faq00000495_033
Paper Jam
Follow the steps below to clear the error message "Paper Jam".
For models with FAX functions:
Before you unplug the machine from the power source, you can transfer your faxes that are stored in the memory to your PC or another fax machine so you will not lose any important messages. Click here to see "How do I forward a fax to another fax machine when my machine has a mechanical problem?"
NOTE: Illustrations shown below are from a representative product and may differ from your Brother machine.
- Unplug the Brother machine from the AC power outlet (electrical socket)
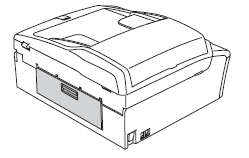
- Turn the machine around and open the Jam Clear Cover (1). Look inside the machine and remove any jammed paper.
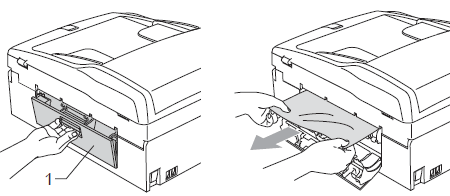
- Close the Jam Clear Cover. Make sure the cover is closed properly.
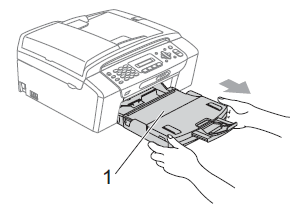
- Pull the paper tray (1) completely out of the machine.
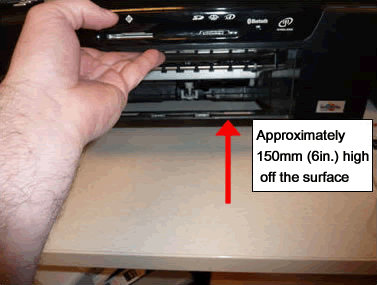
- Look at the inside of the machine where the paper tray was. Using your hand, lift the front of the machine approximately 150 mm (6 in.) off the surface.
- Remove any ripped paper you found in-between each of the black exit rollers. To remove the small pieces of paper, you can use a pair of tweezers.
Please be careful not to touch or scratch the internal part with your hand or tweezers.
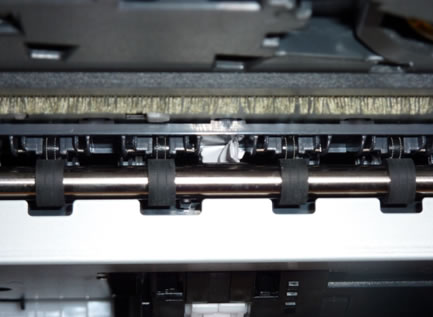
- Check inside the machine.
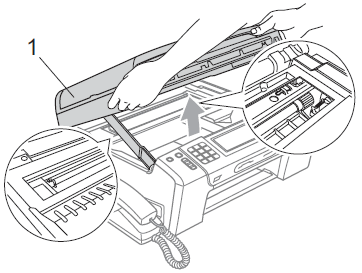
- Lift the Scanner Cover (1) to the open position using the finger hold handles located on the right and left side of the cover.
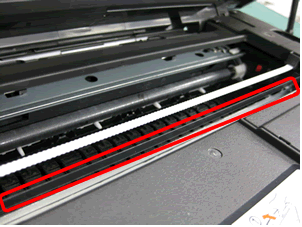
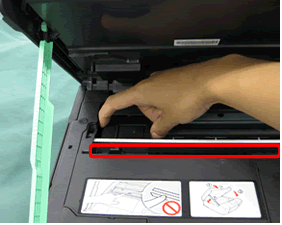
DO NOT touch the encoder strip. The encoder strip is a clear plastic strip in front of the white vinyl band (outlined in red as shown in the picture below). If the encoder gets markings or debris on its surface, it may cause other problems.
- Use your hand to move the print head and remove any pieces of paper remaining under the print head.
Unplug the machine from the power source before you move the print head using your hand.
- Carefully check the left and right side corners and remove any pieces of paper.
- If the print head is at the right corners as shown in the illustration below, you cannot move the print head using your hand. Plug the power cord back into the AC power outlet (electrical socket). Hold down the Stop/ Exit until the print head moves to the middle so that the right hand corner can be checked.
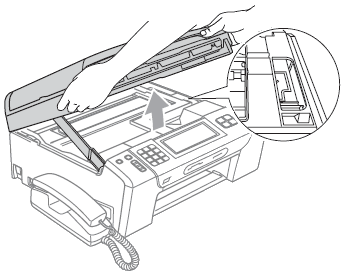
- If ink gets on your skin, immediately wash it off with soap or detergent.
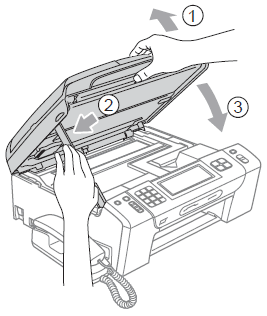
- Lift the scanner cover (1) to release the lock. Gently push the scanner cover support down (2) and close the scanner cover (3) using both hands.
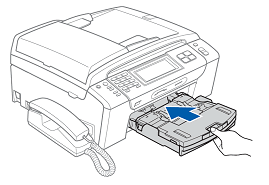
- Put the paper tray back into the machine.
- Make sure you pull out the paper support (1) until it clicks and then unfold the paper support flap (2).
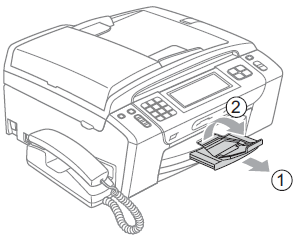
- Plug the power cord back into the AC power outlet (electrical socket).
- Verify the error message is cleared.
If the error message continues to appear, click here to see the FAQ "I still receive the error message "Paper Jam" after I removed the jammed paper."
To avoid future paper jams, adjust the paper side guides (1) and then the paper length guide (2) to fit the paper size.
Make sure that the triangular marks (3) on the paper side guides (1) and paper length guide (2) line up with the marks for the paper size you are using.
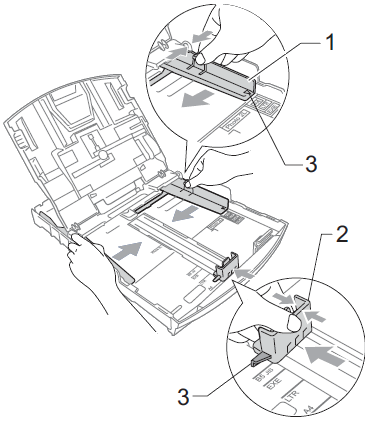
DCP-145C, DCP-165C, DCP-185C, DCP-195C, DCP-385C, DCP-395CN, DCP-585CW, DCP-J125, DCP-J140W, MFC-290C, MFC-295CN, MFC-490CW, MFC-J410, MFC-J415W, MFC-J615W
If you need further assistance, please contact Brother customer service:
Content Feedback
Please note this form is used for feedback only.