MFC-9140CDN
FAQs & Troubleshooting |
MFC-9140CDN
Date: 10/07/2019 ID: faq00000154_057
Replace Drum
Follow the steps below to replace the drum unit:
For the order number (Order No.) of the drum unit, click here to see the Consumables & Options page.
NOTE: Illustrations shown below are from a representative product and may differ from your Brother machine.
-
Make sure that the machine is turned on.
-
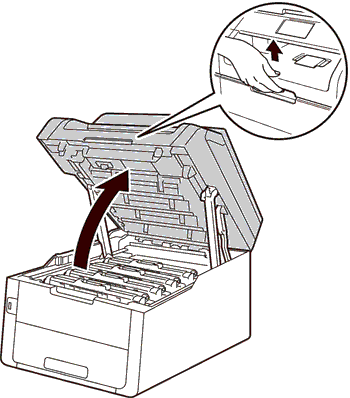
Open the top cover until it locks in the open position.
-
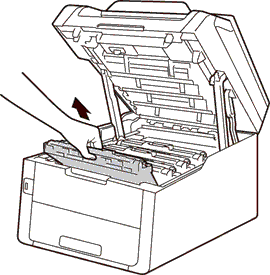
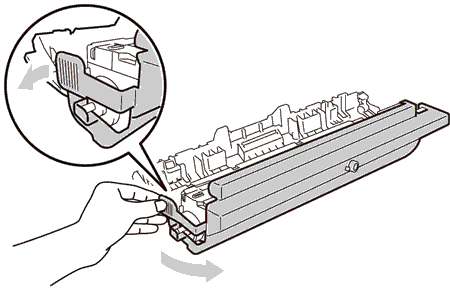
Take out the toner cartridge and drum unit assembly for the color shown on the machine's display.
-
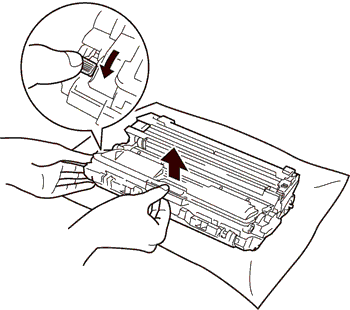
Push down the green lock lever and take the toner cartridge out of the drum unit.
-
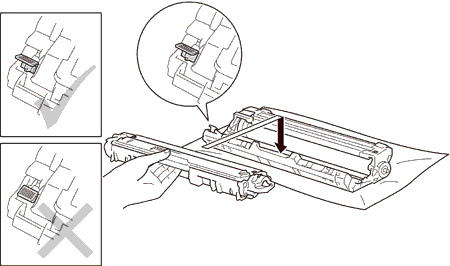
Unpack the new drum unit, and pull off the protective cover.
-
Put the toner cartridge firmly into the new drum unit until you hear it lock into place. If you install the cartridge correctly, the green lock lever on the drum unit will lift automatically.
-
Clean the corona wire inside the drum unit by gently sliding the green tab from left to right and right to left several times.
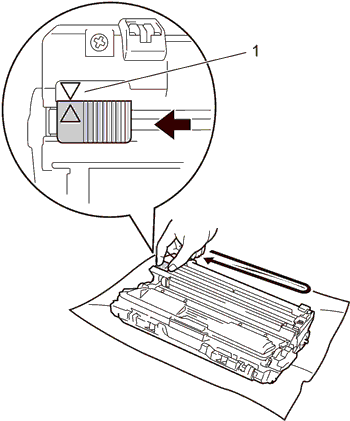
Be sure to return the tab to the home position (
 ) (1). The arrow on the tab must be aligned with the arrow on the drum unit. If it is not, printed pages may have a vertical stripe.
 -
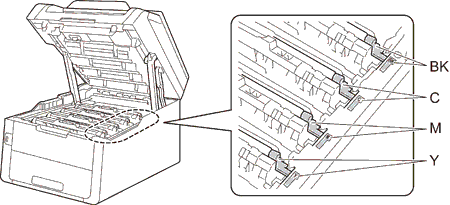
Slide the toner cartridge and drum unit assembly into the machine. Make sure you match the toner cartridge color to the same color label on the machine.

-
To keep good print quality, clean the corona wire inside the drum unit of the other colors. (Repeat Step 3, Step 7, and Step 8.)
-
Close the top cover of the machine.
When you replace a drum unit with a new one, you must reset the drum counter by completing the following steps:
 |
You can see the steps with video clips.
|
-
Press
 (Cancel) to interrupt the error.
-
Press
 (Settings).
-
Press All Settings.
-
Swipe up or down, or press the Up or Down arrow key to display Machine Info..
-
Press Machine Info..
-
Press Parts Life.
-
Touch the dial pad area to light up the LEDs.

-
Press and hold # until the machine's display message changes.
-
Press the color of the drum unit you replaced.
-
Press Yes.
-
Press
 (Home).
MFC-9140CDN, MFC-9330CDW
If you need further assistance, please contact Brother customer service:
Content Feedback
Please note this form is used for feedback only.