PT-E850TKW
FAQs & Troubleshooting |
PT-E850TKW
Date: 09/01/2024 ID: faqp00100259_000
How to insert a tape cassette
- The tape / ribbon cassettes which can be used in your printer vary depending on your country.
- The illustrations may slightly differ depending on your printer’s model.
-
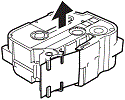
If the new tape cassette has a cardboard stopper, be sure to remove the stopper before inserting the cassette.
-
Check that the end of the tape is not bent and that it passes through the tape guide. If it does not, pass it through the tape guide as shown in the illustration.
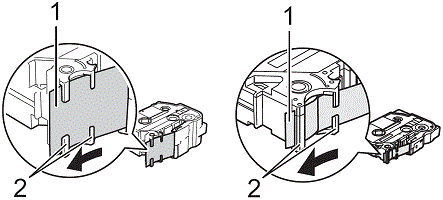
1 End of tape
2 Tape guides (The actual shape may be different depending on the tape width.)
-
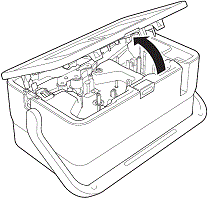
Press the cover open button to open the top cover.
-
Insert the tape cassette into the tape cassette compartment with the end of the tape facing the printer’s tape exit slot, then push down evenly until the tape cassette is installed correctly.
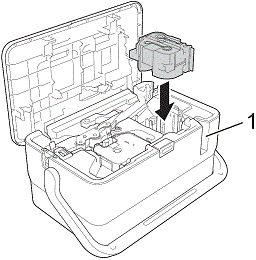
1 Tape exit slot - When inserting the tape cassette, make sure that the tape and ink ribbon do not catch on the print head.
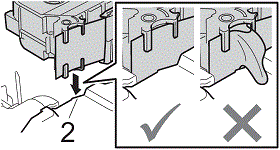
- Make sure that there is no slack in the tape, and then carefully insert the tape cassette. If there is slack in the tape, the tape will catch on the protrusion (2) when the cassette is inserted and become bent or wrinkled, causing the tape to jam. To fix the slack in the tape, refer to the illustration in step 1 and pull the tape outside of the tape guide.
-
When removing the tape cassette, make sure that the tape does not catch on the protrusion (2).
-
Close the top cover.
Store tape cassettes in a cool dark location, away from direct sunlight and high temperature, high humidity, or dusty locations. After opening the sealed package, use the tape cassette as quickly as possible.
Movie: How to print a label
(This movie is created with PT-E850TKW.)
*The video clip is being streamed from YouTube.
PT-E800T, PT-E850TKW
If you need further assistance, please contact Brother customer service:
Content Feedback
To help us improve our support, please provide your feedback below.
Step 1: How does the information on this page help you?
Step 2: Are there any comments you would like to add?
Please note this form is used for feedback only.