MFC-660CN
FAQs & Troubleshooting |
MFC-660CN
Date: 06/12/2016 ID: faq00000495_027
How do I clear the message "PAPER JAM" from the display?
The message Paper Jam may appear on the display if the Brother machine is not feeding paper correctly, paper scraps have become stuck in the print head path, the paper is not loaded properly in the paper tray, the jam clear cover located in the back of the machine, is not installed properly or the PE Actuator is missing or damaged.
To solve this problem, please follow the steps listed below:
Note: Images shown below are from the representative product and may differ from your Brother machine.
-
Disconnect the machine from the power supply.
-
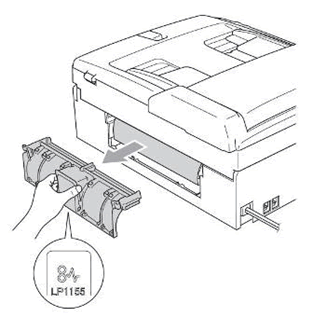
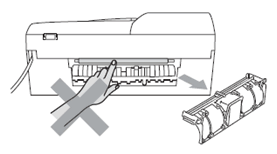
Turn the unit around and remove the Jam Clear Cover from the back of the machine by grasping it at the centre and pulling it straight away from the rear of the machine.
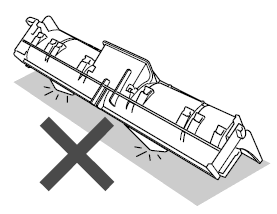
DO NOT place the jam clear cover face down as shown in the illustration. You may damage the cover and cause a paper jam.
-
Look for any paper scraps, jammed paper or foreign objects in the rear of the unit. If anything is found, remove it.
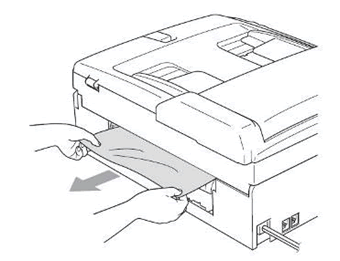
Be careful not to touch the feed roller.
-
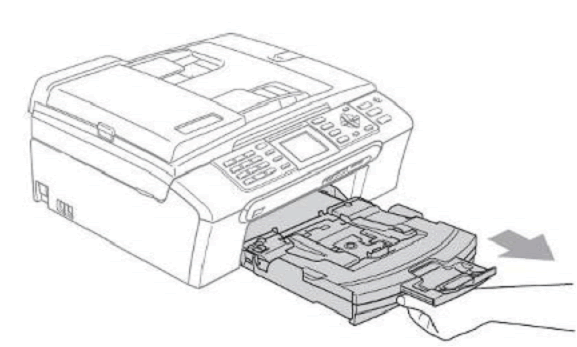
Remove the Paper Tray from the machine.
-
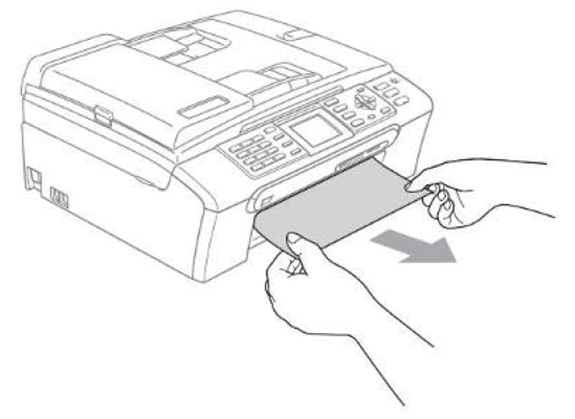
Remove any remaining or jammed paper from the front of the machine.
-
Look inside the machine, where the paper tray was installed and locate the white PE Actuator.
Do not stand the machine on end. Ink may leak from the machine.

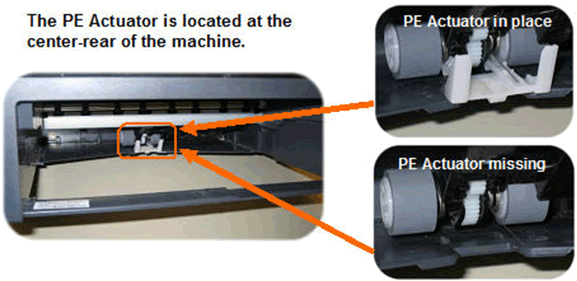
The PE Actuator looks like a 2 prong fork or tuning fork and is located near the rear centre of the machine where the paper tray slides in. It is located between the 2 grey rollers.-
If the White PE Actuator is in place, continue to Step 7.
-
If the White PE Actuator is missing, please contact Brother Customer Service from "Contact Us".
-
If the White PE Actuator is in place, continue to Step 7.
-
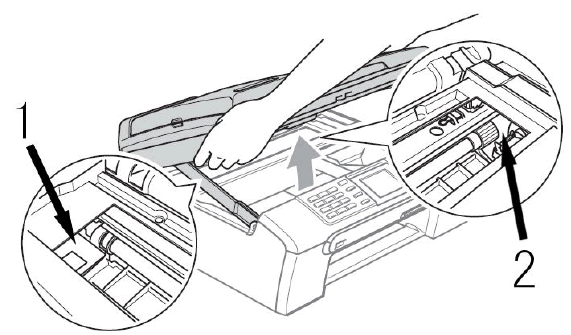
Using both hands, use the plastic tabs on both sides of machine to lift the flat-bed scanner until it locks securely into the open position.
-
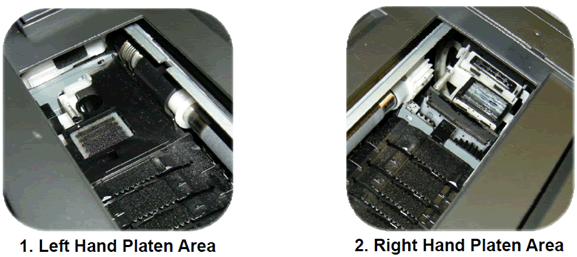
Carefully examine areas 1 and 2 at the left and right hand ends of the platen area for paper scraps.
-
These scraps may have become saturated with ink and be difficult to see.
-
Use a flashlight if necessary to check thoroughly.
-
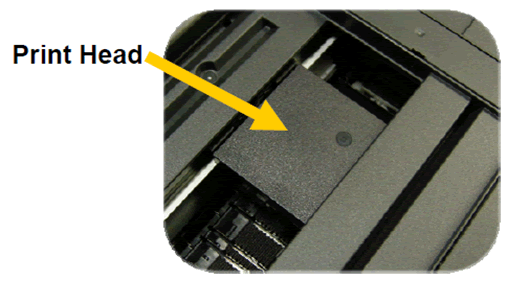
It may be necessary to move the print head to gain access to one side of the platen area or the other.
-
Before moving the print head, disconnect the machine from the power supply.
-
Move the print head gently using your fingers.
-
Be careful not to force the print head to move. With the power off it should move easily.
-
Carefully examine areas 1 and 2 at the left and right hand ends of the platen area for paper scraps.
-
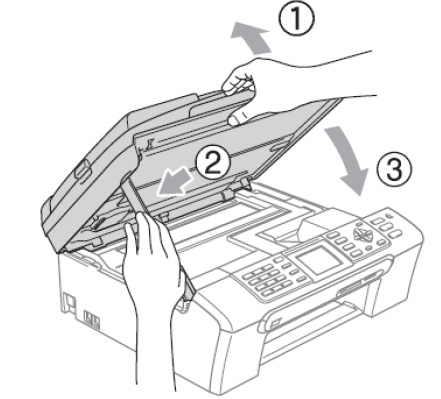
Lift the scanner cover to release the lock (1). Gently push the scanner cover support down (2) and close the scanner cover (3).
-
Again, turn the unit around and check if there are paper jams.
-
After making sure there are no paper jams, reinstall the Jam Clear Cover. Make sure the rear cover is completely on. When installed it should be flush with the back of the machine.

-
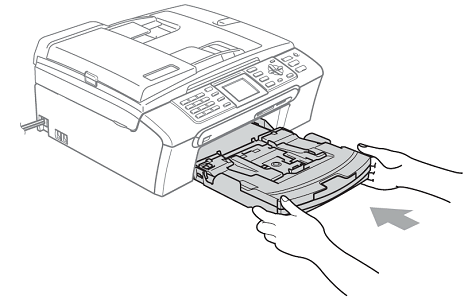
After making sure there are no paper jams, reinstall the paper tray by slowly pushing the tray all the way in. You should hear a slight snap or click once the tray is seated properly.
Make sure you pull out the paper support until it clicks.
-
Did the machine reset and return to the standby display?
-
If Yes, Go to Step 13,
-
If No, please see the warranty information below.
-
If Yes, Go to Step 13,
-
Test the machine by printing the Print Quality Check Sheet (PQCS).
-
Press Ink or Ink Management.
(If your machine does not have Ink or Ink Management, press Menu and select Ink or Ink Management.) - Press the UP OR DOWN ARROW key to select Test Print. Press OK.
- Press the UP OR DOWN ARROW key to select Print Quality. Press OK.
- Press Color (Colour) Start.
- The PQCS should begin printing.
-
If the page prints correctly and ejects completely from the machine the problem is resolved. Press 1 or the UP ARROW key or + to select Yes and press Stop/Exit to return to the standby mode.
-
If the page prints and ejects but the print quality is not good, follow the prompts on the LCD to clean the print head and reprint the PQCS. Refer to "FAQs & Troubleshooting" for further information on the print quality.
-
If the PAPER JAM indication reappears, clear the jam again by repeating steps 1-9 then continue.
- If you receive error messages, such as "Machine error 46" and "unable to ...", refer to the Related FAQs at the end of the page.
-
Press Ink or Ink Management.
-
Confirm that the paper being used meets the proper specification.
Refer to the "User's Guide" in the Manuals section for information on paper specification.
If you are printing photographs, confirm that the photo paper you are using is either Brother Genuine or meets the specifications for photo printing.
If you are not printing photographs, verify that the paper is of the proper specification for this machine.Do not use paper that is damaged, curled, wrinkled or irregularly shaped, extremely shiny, highly textured or that was previously printed by a printer.
-
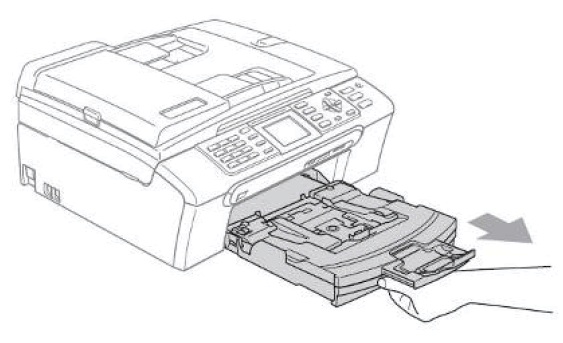
Remove the Paper Tray from the machine and remove any paper from it .
-
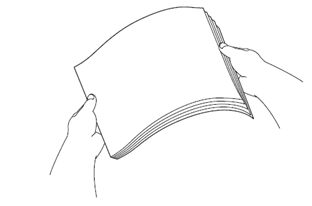
Fan the stack of paper well to avoid paper jams and misfeeds.
-
Gently insert the paper into the paper tray. The paper must be completely flat in the paper tray or feed problems may occur.

-
Adjust the blue Paper Side Guides, located on either side of the tray, to fit the width of the paper.
The paper side guides should barely make contact with the papers edges.
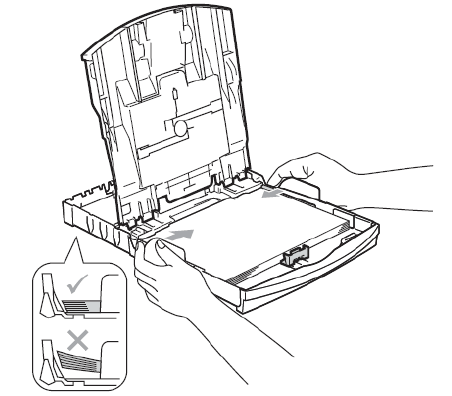
Be careful not to push the paper in too far. It may lift at the back of the tray and cause feed problems.
-
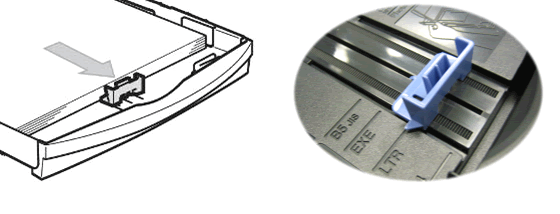
Adjust the blue Paper Length Guide (located in the front-centre of the tray) to fit the paper size you are using; if you are using A4 size paper, the pointer should be aligned with A4.
-
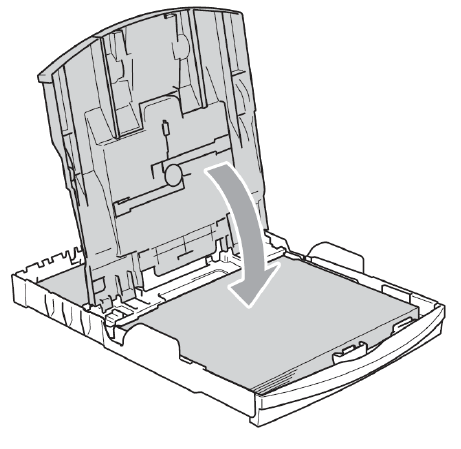
Close the paper tray cover.
-
Reinstall the paper tray by slowly pushing the tray all the way in, you should hear a slight snap or click once the tray is seated properly.

- Test the machine again by printing another Print Quality Check Sheet (PQCS) following Step 11.
Related FAQs
DCP-130C, DCP-135C, DCP-150C, DCP-330C, DCP-350C, DCP-357C, DCP-540CN, DCP-560CN, DCP-750CW, DCP-770CW, MFC-235C, MFC-240C, MFC-260C, MFC-440CN, MFC-465CN, MFC-660CN, MFC-680CN, MFC-845CW, MFC-885CW
If you need further assistance, please contact Brother customer service:
Content Feedback
Please note this form is used for feedback only.