HL-3040CN
FAQs & Troubleshooting |
HL-3040CN
Date: 23/08/2013 ID: faq00000316_010
How do I replace the Belt Unit?
Follow the procedure below to replace the belt unit
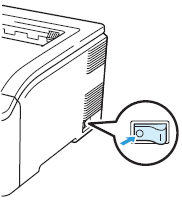
- Turn off the printer power switch.
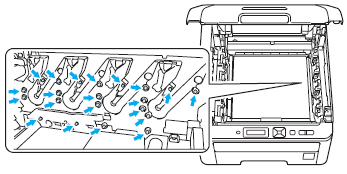
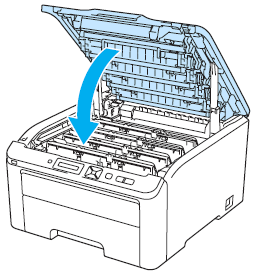
- Fully open the top cover by lifting up on the handle (1).
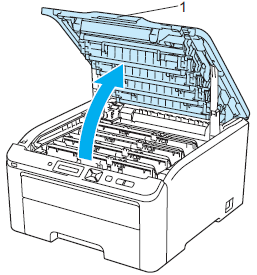
- Take out all the drum unit and toner cartridge assemblies.
- We recommend that you place the drum unit and toner cartridge assembly on a clean, flat surface with a sheet of disposable paper or cloth underneath it in case you accidentally spill or scatter toner.
- To prevent damage to the printer from static electricity, DO NOT touch the electrodes shown in the illustration.
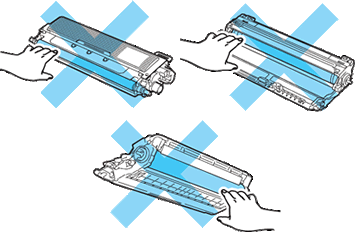
- Handle the toner cartridge carefully. If toner scatters on your hands or clothes, wipe or wash it off with cold water at once.
- To avoid print quality problems, DO NOT touch the shaded parts shown in the illustrations.
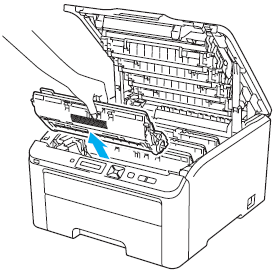
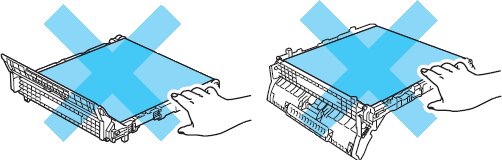
- Hold the green handle of the belt unit and lift the belt unit up, then pull it out.

To avoid print quality problems, DO NOT touch the shaded parts shown in the illustrations.
- Unpack the new belt unit and put the new belt unit in the printer.
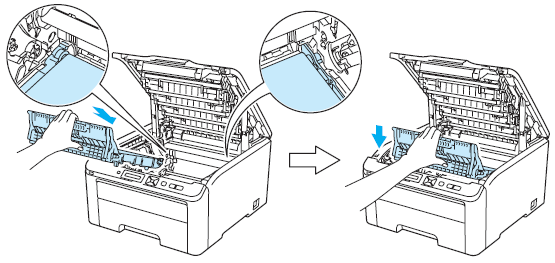
- Slide the drum unit and toner cartridge assembly into the printer. Make sure that you match the toner cartridge colour to the same colour label on the printer. Repeat this for all the drum unit and toner cartridge assemblies.
C- Cyan, M- magenta, Y- Yellow, K- Black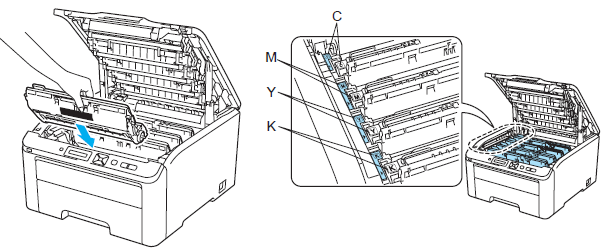
- Close the top cover of the printer.
When you replace the belt unit with a new one, you need to reset the belt unit counter. Go to the Step 8 to complete the steps.
- Reset the belt unit counter as follows:
- Turn the printer power switch back on.
- Press + or - to choose "Machine Info.".
- Press OK to proceed to the next menu level, and then press + or - to choose "Reset Parts Life".
- Press OK, and then press + to choose "Belt Unit".
- Press OK two times.
HL-3040CN, HL-3070CW
If you need further assistance, please contact Brother customer service:
Content Feedback
To help us improve our support, please provide your feedback below.
Step 1: How does the information on this page help you?
Step 2: Are there any comments you would like to add?
Please note this form is used for feedback only.